
Local dev
Guide to connect your local database to Velvet
Connect your local database to your Velvet workspace.
Set up ngrok
ngrok is a unified ingress platform for developers to test and preview applications and APIs. Follow this guide to set up ngrok with your local development environment.
- Install ngrok here.
- Authenticate ngrok in your terminal
sh ngrok authtoken <your_auth_token>. - Identify the port your local development database is running on.
- Start an ngrok tunnel to your database's port using the following command
sh ngrok tcp <database_port>. - Once the tunnel is up, ngrok will display a forwarding address that looks something like
tcp://0.tcp.ngrok.io:12345. This address consists of a randomly generated domain and port that will forward traffic to your local database port through the tunnel. - To connect your database to Velvet, use the forwarding address and port provided by ngrok as the host and port in your database connection string. You'll also need to provide the appropriate username, password, and database name as required by your database.
See further instructions and connection string syntax below for each database.
PostgreSQL
Create the connection string
Given the example forwarding address: tcp://[0.tcp.ngrok.io](http://0.tcp.ngrok.io):12345 the host will be 0.tcp.ngrok.io and the port is 12345.
Assuming the database name your_db_name, the username your_username and the password is your_password, your connection string should be postgresql://your_username:[email protected]:12345/your_db_name.
Supabase
To connect a local Supabase DB, you'll need to run a local version of Supabase.
Run Supabase Locally
-
Ensure you have Docker and Docker Compose installed on your machine. Docker is used to containerize and run the services Supabase requires, such as PostgreSQL, Auth, and Storage.
-
Supabase maintains a GitHub repository with a Docker Compose file that you can use to start Supabase locally. You can clone this repository or just download the relevant
docker-compose.ymlfile. The repo you're looking for issupabase/supabase. They provide a quickstart command for cloning with just the necessary files:git clone --depth 1 https://github.com/supabase/supabase cd supabase -
Once inside the cloned directory, use Docker Compose to start all the required services. The following command starts all the necessary services defined in the
docker-compose.yml, including the Postgres database, Auth service, Realtime for subscription services, and Storage:docker-compose up -
After starting the services, you can access the Supabase Studio (the web interface for managing your Supabase project) through your browser, usually at
http://localhost:3000or another port specified in the Docker Compose output.
Create the connection string
Given the example forwarding address: tcp://[0.tcp.ngrok.io](http://0.tcp.ngrok.io):12345 the host will be 0.tcp.ngrok.io and the port is 12345.
Assuming the database name your_db_name, the username your_username and the password is your_password, your connection string should be postgresql://your_username:[email protected]:12345/your_db_name.
Fly
Fly.io's PostgreSQL offering, often referred to as "Fly Postgres," is designed to run on Fly.io's infrastructure, leveraging their global network for high availability and performance.
To mimic or work with a PostgreSQL database setup locally that resembles what you'd deploy on Fly.io, instal PostgreSQL on your local machine and configure it similarly to your Fly.io setup.
Run PostgreSQL Locally:
- Download and install PostgreSQL from the official website or use a package manager for your operating system (
apton Ubuntu,brewon macOS, orchocoon Windows). - Set up your local PostgreSQL instance to match the configuration you use on Fly.io as closely as possible. This includes creating databases, users, and configuring any necessary extensions.
Create the connection string
Given the example forwarding address: tcp://[0.tcp.ngrok.io](http://0.tcp.ngrok.io):12345 the host will be 0.tcp.ngrok.io and the port is 12345.
Assuming the database name your_db_name, the username your_username and the password is your_password, your connection string should be postgresql://your_username:[email protected]:12345/your_db_name.
MongoDB
Create the connection string
Given the example forwarding address: tcp://[0.tcp.ngrok.io](http://0.tcp.ngrok.io):12345 the host will be 0.tcp.ngrok.io and the port is 12345.
Assuming the database name your_db_name, the username your_username and the password is your_password, your connection string should be mongodb://your_username:[email protected]:12345/your_db_name.
MySQL
Create the connection string
Given the example forwarding address: tcp://[0.tcp.ngrok.io](http://0.tcp.ngrok.io):12345 the host will be 0.tcp.ngrok.io and the port is 12345.
Assuming the database name your_db_name, the username your_username and the password is your_password, your connection string should be myql://your_username:[email protected]:12345/your_db_name.
Snowflake
To connect a local Snowflake instance you'll need to run a local version of Snowflake.
There is no direct Snowflake container or local version. Developers sometimes use Docker containers running databases like Postgres or MySQL to simulate Snowflake’s SQL capabilities. This approach won't replicate Snowflakes architecture or performance, but can be used for SQL testing.
Run PostgreSQL or MySQL Locally:
- Ensure you have Docker and Docker Compose installed on your machine. Run a PostgresQL or MySQL container:
For PostgreSQL:
docker run --name my-database -e POSTGRES_PASSWORD=mypassword -d postgres
- The command above creates a PostgreSQL database named
my-databasewith passwordmypassword. - PostgreSQL uses the default port
5432.
For MySQL:
docker run --name my-database -e MYSQL_ROOT_PASSWORD=mypassword -d mysql:tag
- The command above creates a MySQL database named
my-databasewith passwordmypassword. - MySQL uses the default port
3306.
Create the connection string
Given the example forwarding address: tcp://[0.tcp.ngrok.io](http://0.tcp.ngrok.io):12345 the host will be 0.tcp.ngrok.io and the port is 12345.
Assuming the database name your_db_name, the username your_username and the password is your_password, your connection string should be postgresql://your_username:[email protected]:12345/your_db_name.
S3
To connect a local S3 instance, you'll need to run a local version of S3.
Run S3 locally using MinIO
-
Ensure you have Docker and Docker Compose installed on your machine.
-
MinIO is an open-source tool designed to provide an AWS S3 compatible object storage system.
-
Open a terminal and run the following command to pull the latest MinIO Docker image:
docker pull minio/minio -
Start a MiniO instance as an S3 server using the following command:
mkdir -p ~/minio/data docker run \ -p 9000:9000 \ -p 9001:9001 \ --name minio \ -v ~/minio/data:/data \ -e "MINIO_ROOT_USER=ROOTNAME" \ -e "MINIO_ROOT_PASSWORD=CHANGEME123" \ quay.io/minio/minio server /data --console-address ":9001"mkdircreates a new local directory at~/minio/datain your home directory.docker runstarts the MinIO container.pbinds a local port to a container port.namecreates a name for the container.vsets a file path as a persistent volume location for the container to use. When MinIO writes data to/data, that data mirrors to the local path~/minio/data, allowing it to persist between container restarts. You can replace~/minio/datawith another local file location to which the user has read, write, and delete access.esets the environment variables[MINIO_ROOT_USER](https://min.io/docs/minio/linux/reference/minio-server/settings/root-credentials.html#envvar.MINIO_ROOT_USER)and[MINIO_ROOT_PASSWORD](https://min.io/docs/minio/linux/reference/minio-server/settings/root-credentials.html#envvar.MINIO_ROOT_PASSWORD). These set the root user credentials. Change the example values to use for your container. -
Open a web browser and navigate to http://localhost:9001 to access the MinIO console. Log in with the MINIO_ROOT_USER and MINIO_ROOT_PASSWORD you specified earlier.
-
Once logged in you can create buckets, upload files and manager your data similarly to how you would on AWS S3.
-
Use database port
9001in the next section regarding ngrok.
Create the connection string
Given the example forwarding address: tcp://[0.tcp.ngrok.io](http://0.tcp.ngrok.io):12345 the host will be 0.tcp.ngrok.io and the port is 12345.
Assuming the database name your_db_name, the username your_username and the password is your_password, your connection string should be postgresql://your_username:[email protected]:12345/your_db_name.
Connect your local database to Velvet
Connect your database to Velvet using your connection string.
- Tap into a workspace in your Velvet dashboard
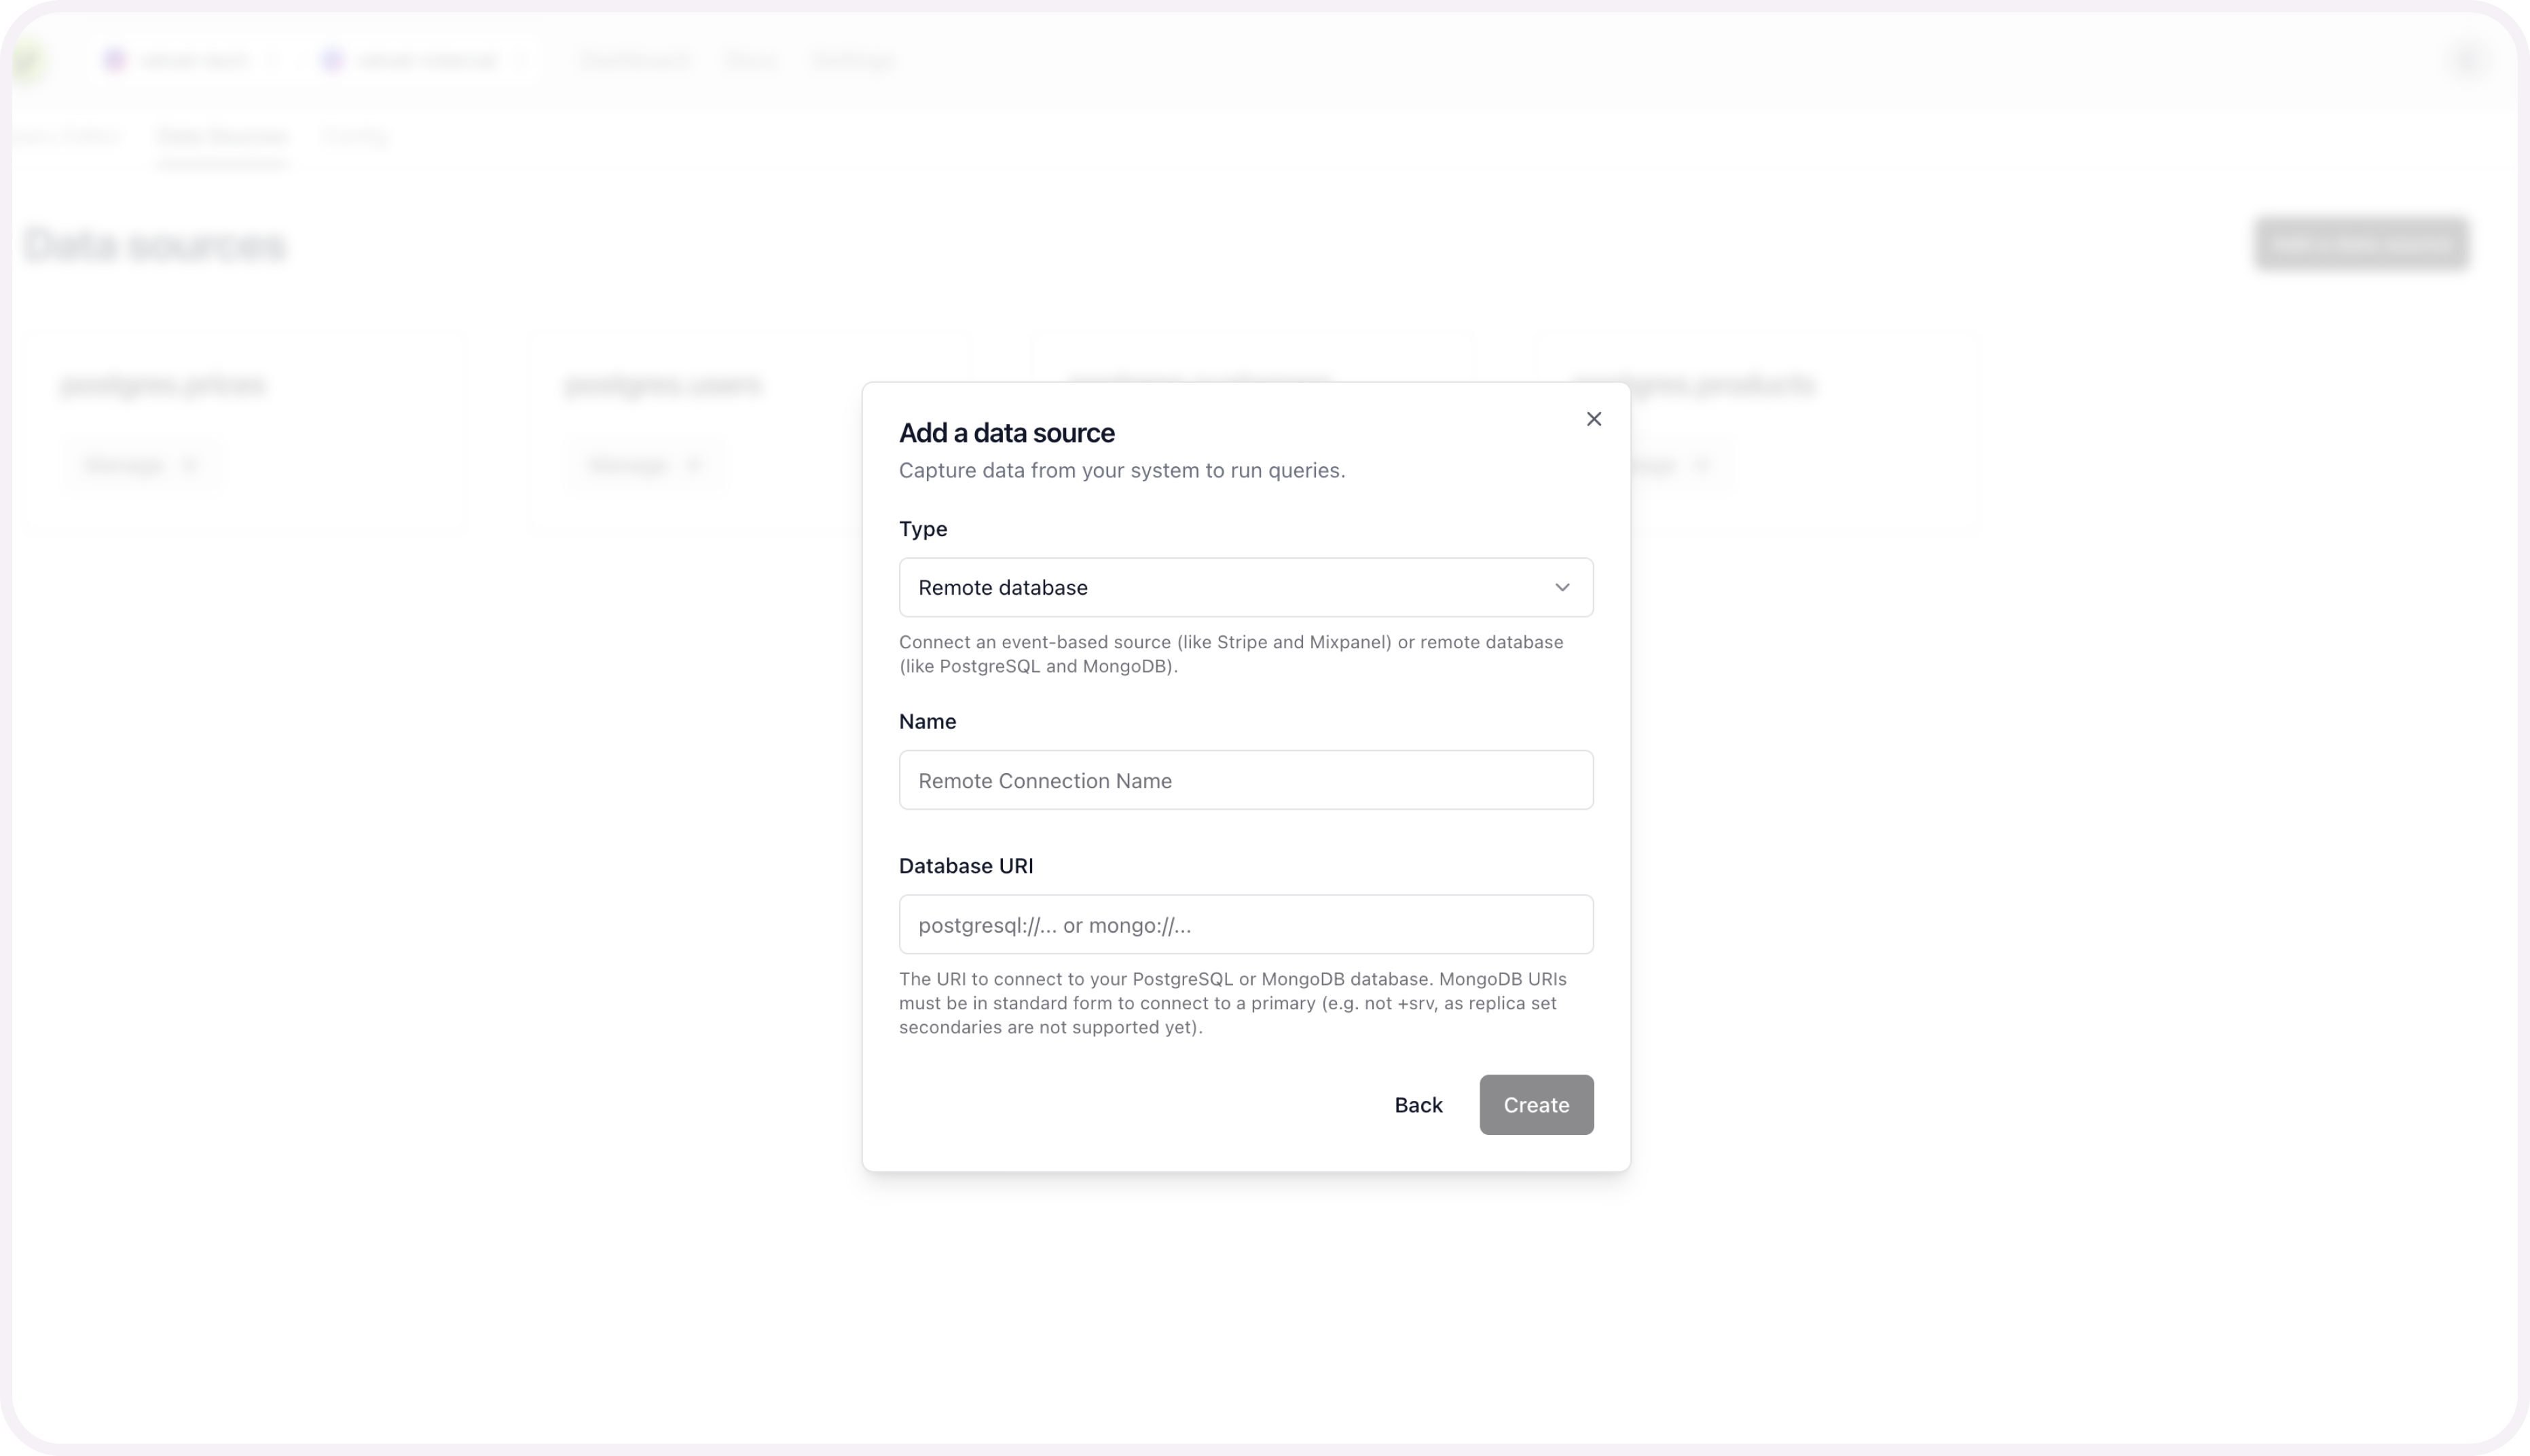
- Tap "Add a data source"
- Select type "Remote database"
- Name your database
- Paste in your database URI
- Press create
If you run into any errors, schedule a call or email [email protected].
Once your database is connected, you're ready to use the AI SQL editor. Close out of the modal to start using the editor on top of your database.
Schema mapping is optional, and only required if you want to query multiple sources at the same time.
5. [optional] Schema mapping for unified sources
This configuration is only required to query multiple data sources at the same time. For example - two databases at the same time, or stripe webhooks alongside your database tables.
You can set up this unified mapping any time.
Add schema mapping context
After you connect your database, you'll be prompted to configure the schema for each table you set up.

Name your table to create this source.
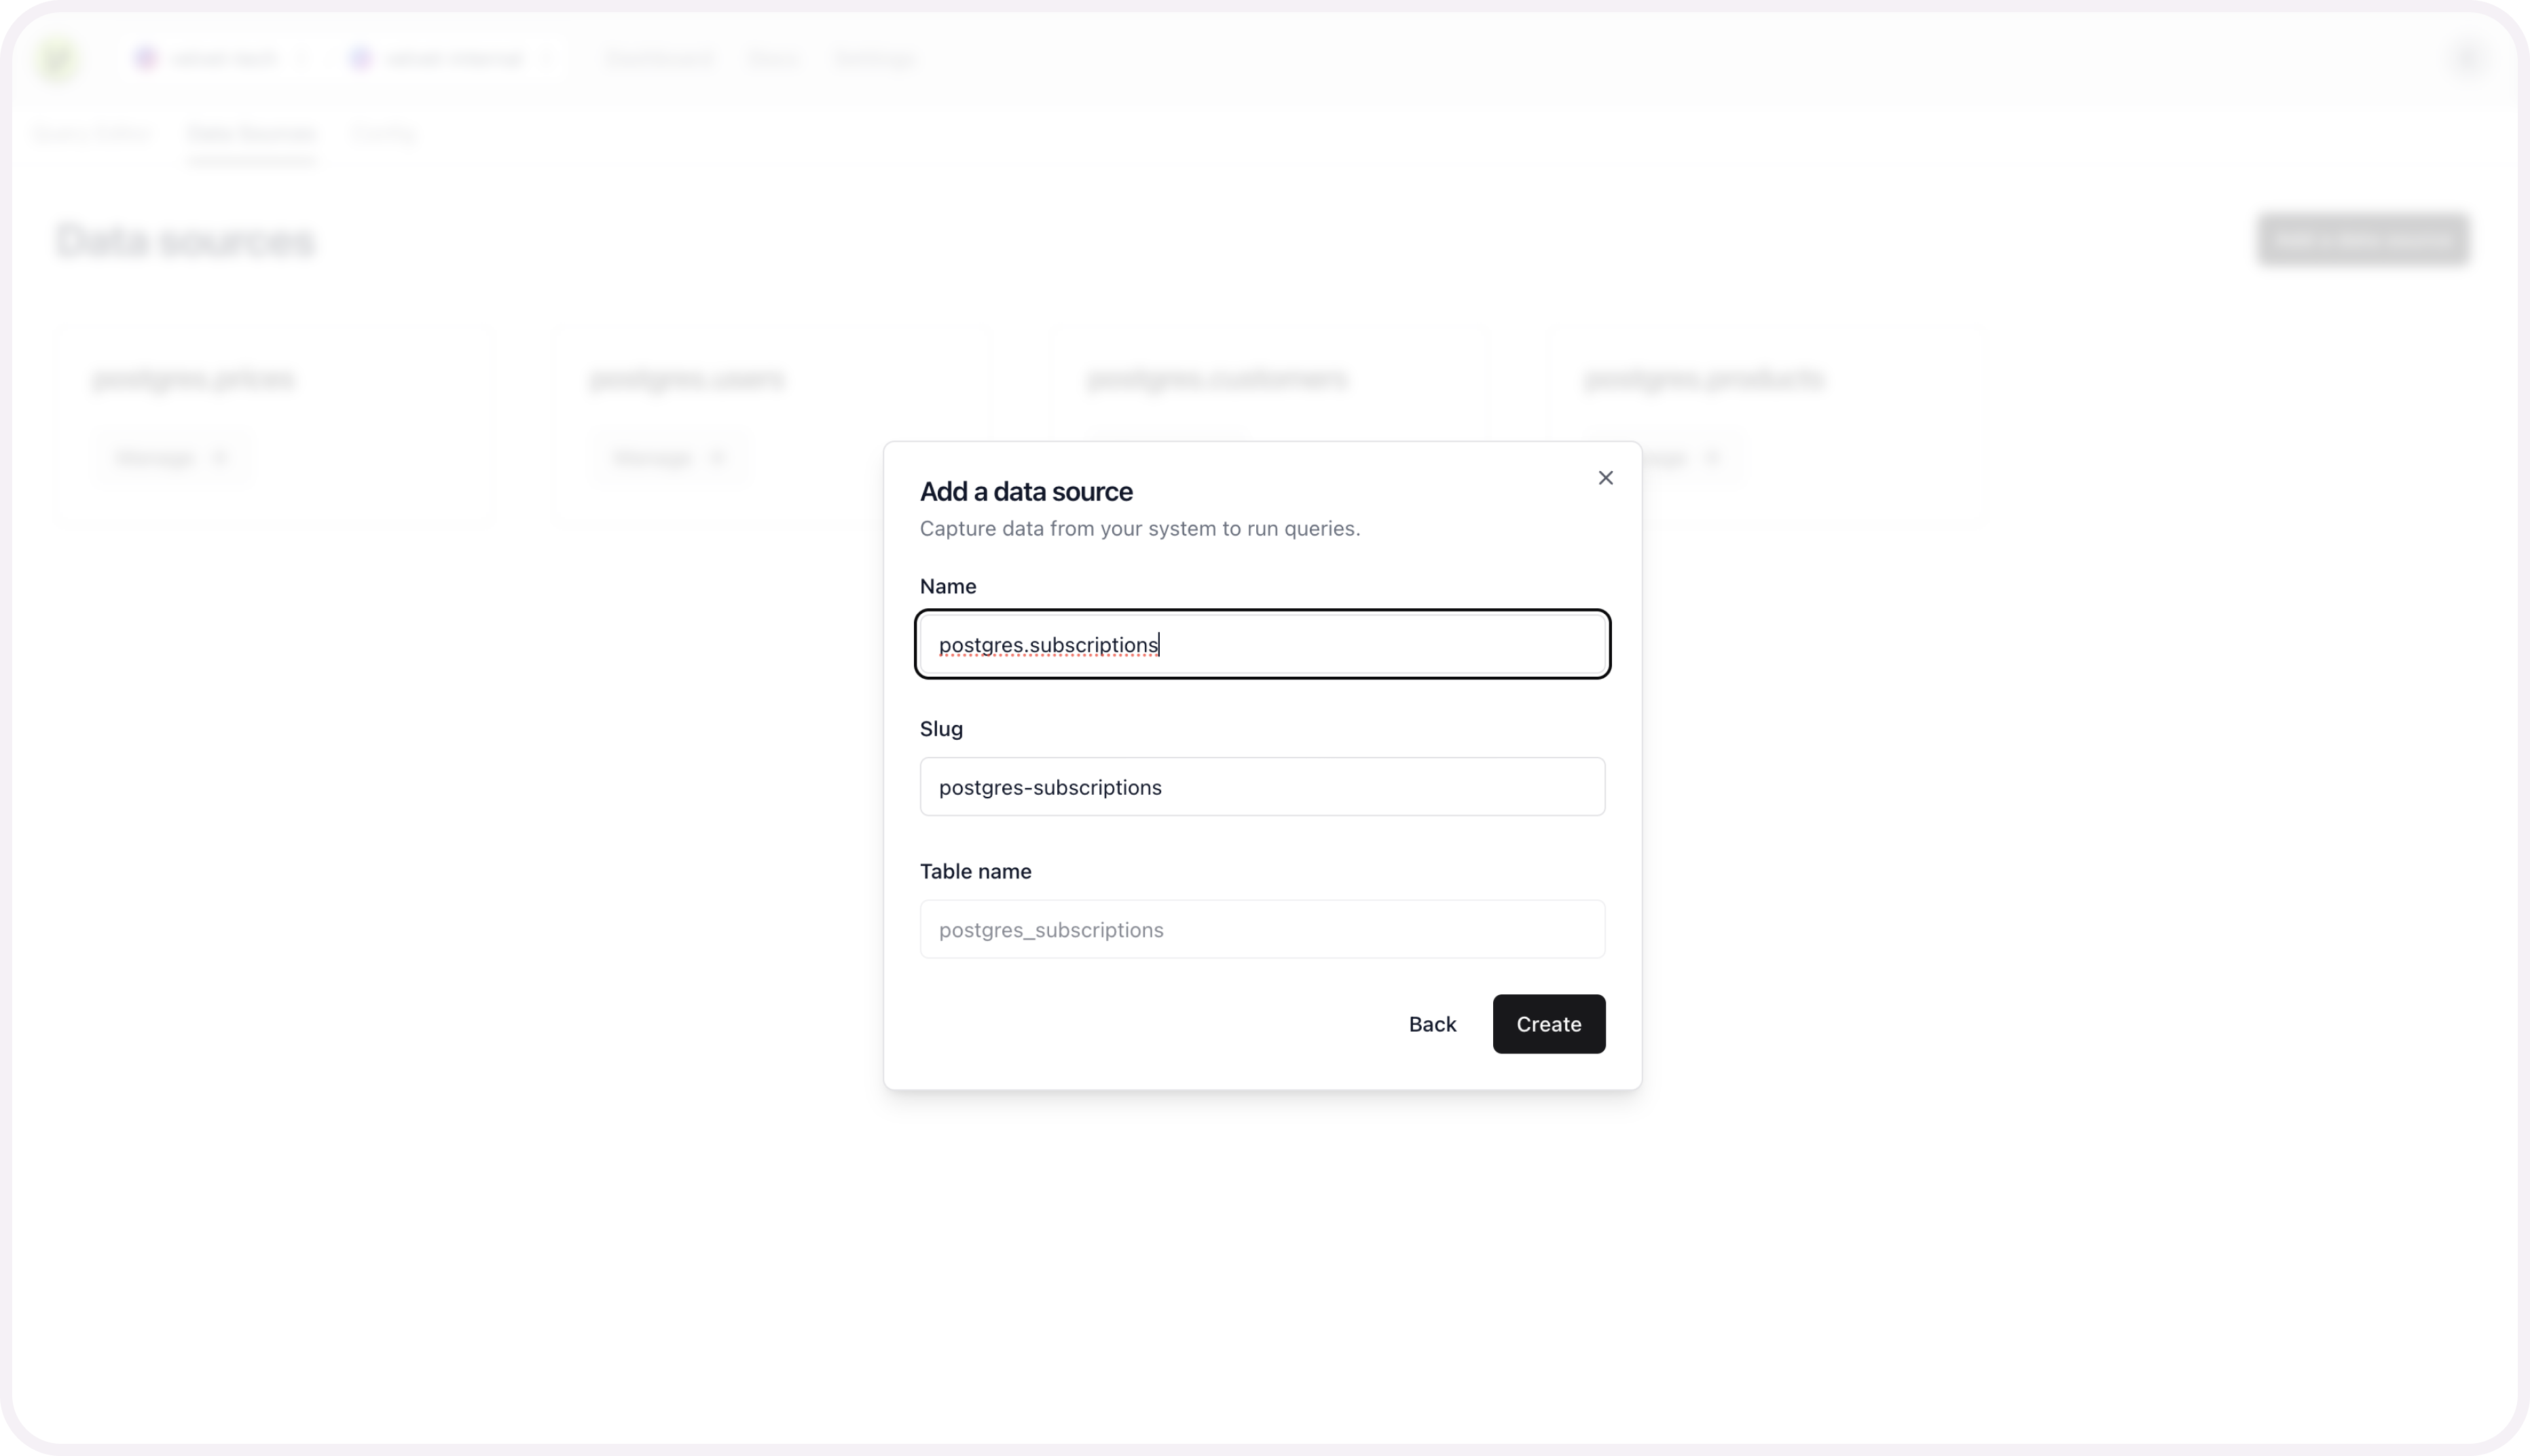
Repeat these schema mapping steps for each table you want included as a unified data source.
Get help
Email [email protected] if you need additional support.
Updated 3 months ago