
Render
Guide to connect Render to Velvet
Connect your Render database to your Velvet workspace. You can skip some steps if you've previously connected to other services.
1. Create a read-only user
Create a user with read-only permissions in Render.
Navigate to your Render account dashboard and identify your database, click the three dots to the right and click on “Settings.

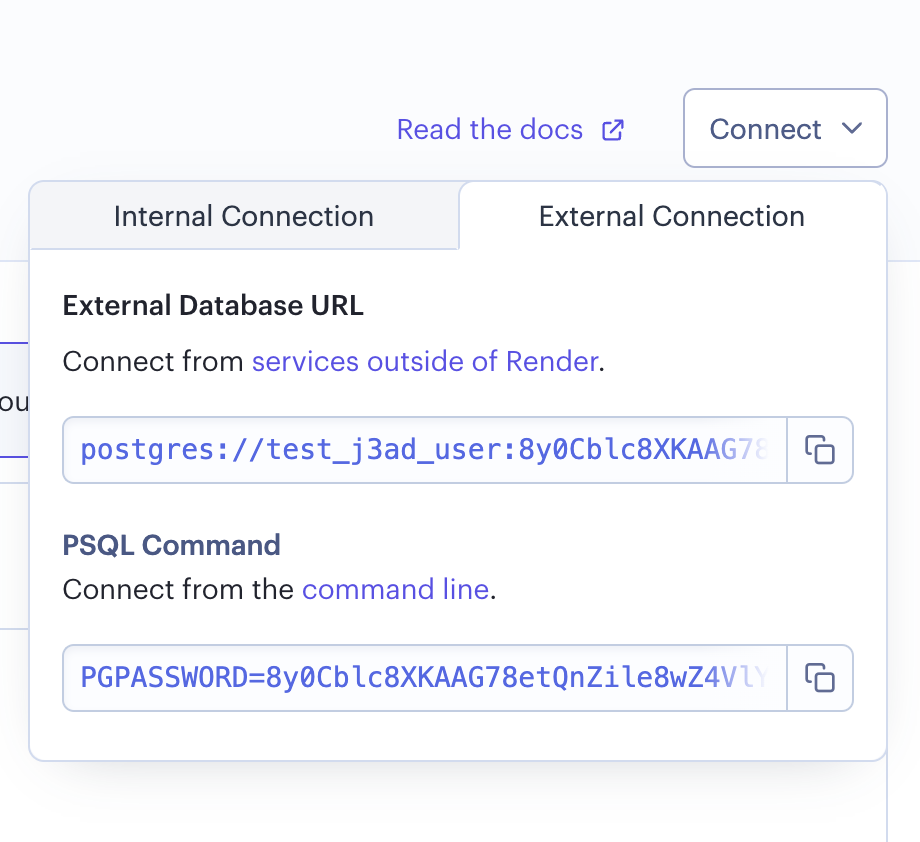
From your database dashboard, click connect. Switch to the external connection tab and copy the “PSQL Command.” You will paste this in your terminal. This will open up a psql session to your database.
PostgreSQL v14 includes a pg_read_all_data role. Run SELECT version(); in the psql session to determine your version.
For PostgreSQL v14 and above
-- Create a "velvet_readonly" user and associate the "pg_read_all_data" role.
-- We give the user BYPASSRLS privileges in order to introspect the db structure.
CREATE USER velvet_readonly WITH PASSWORD 'a very good password' BYPASSRLS;
GRANT pg_read_all_data TO velvet_readonly;
ALTER ROLE velvet_readonly SET statement_timeout = 0;
For PostgreSQL v13 and below
-- Create a "velvet_read_all_data" role, find all the user generated schemas,
-- and associate the correct grants.
CREATE ROLE velvet_read_all_data;
DO $do$
DECLARE
    sch text;
BEGIN
    FOR sch IN SELECT schema_name FROM information_schema.schemata WHERE schema_name NOT LIKE 'pg_%' AND schema_name != 'information_schema'
    LOOP
        EXECUTE format($$ GRANT USAGE ON SCHEMA %I TO velvet_read_all_data $$, sch);
        EXECUTE format($$ GRANT SELECT ON ALL TABLES IN SCHEMA %I TO velvet_read_all_data $$, sch);
        EXECUTE format($$ GRANT SELECT ON ALL SEQUENCES IN SCHEMA %I TO velvet_read_all_data $$, sch);
        EXECUTE format($$ ALTER DEFAULT PRIVILEGES IN SCHEMA %I GRANT SELECT ON TABLES TO velvet_read_all_data $$, sch);
        EXECUTE format($$ ALTER DEFAULT PRIVILEGES IN SCHEMA %I GRANT SELECT ON SEQUENCES TO velvet_read_all_data $$, sch);
    END LOOP;
END;
$do$;
-- Create a "velvet_readonly" user and associate the "velvet_read_all_data" role.
-- We give the user BYPASSRLS privileges in order to introspect the db structure.
CREATE USER velvet_readonly WITH PASSWORD 'a very good password' BYPASSRLS;
GRANT velvet_read_all_data TO velvet_readonly;
ALTER ROLE velvet_readonly SET statement_timeout = 0;
Alternate solution: Create a read replica
Instead of creating a read-only user, you can create a read replica. You must be on Render's standard database plan (or above) to unlock this functionality.
Navigate to your Render account dashboard and identify your database, click the three dots to the right and click on “Settings."

Under “General” settings, click on “Add Read Replica.” You can now use this connection string to connect to Velvet.
2. Set static IPs
Configure network restrictions to allow Velvet's static IP addresses. Follow our static IP configuration guide.
3. Build your connection string
Read our general guide on URI construction here. The Render-specific overview is below.
If you already have a connection string - copy it and skip to step #4.
Build a connection string
Navigate to your Render account dashboard and identify your database. Click the three dots to the right and click on “Settings"

From your database dashboard, click "connect". Switch to the external connection tab and copy the “External Database URL.”

Additionally, you'll need to add an options object to the ssl param at the end of your External Database URL. The connection object:
{
	"rejectUnauthorized":false,
	"servername":"dpg-xxxxxxxxxxxxxxxxxxxxx-a.oregon-postgres.render.com"
}
The syntax results in: External connection URL, ssl param, connection object.
Example connection url:
postgres://user:[email protected]/mydatabase?ssl={"rejectUnauthorized":false, "servername":"dpg-xxxxxxxxxxxxxxxxxxxxx-a.oregon-postgres.render.com"}
Copy your connection string to paste it into Velvet.
4. Connect your database
Connect your database to Velvet using your connection string.
- Tap into a workspace in your Velvet dashboard
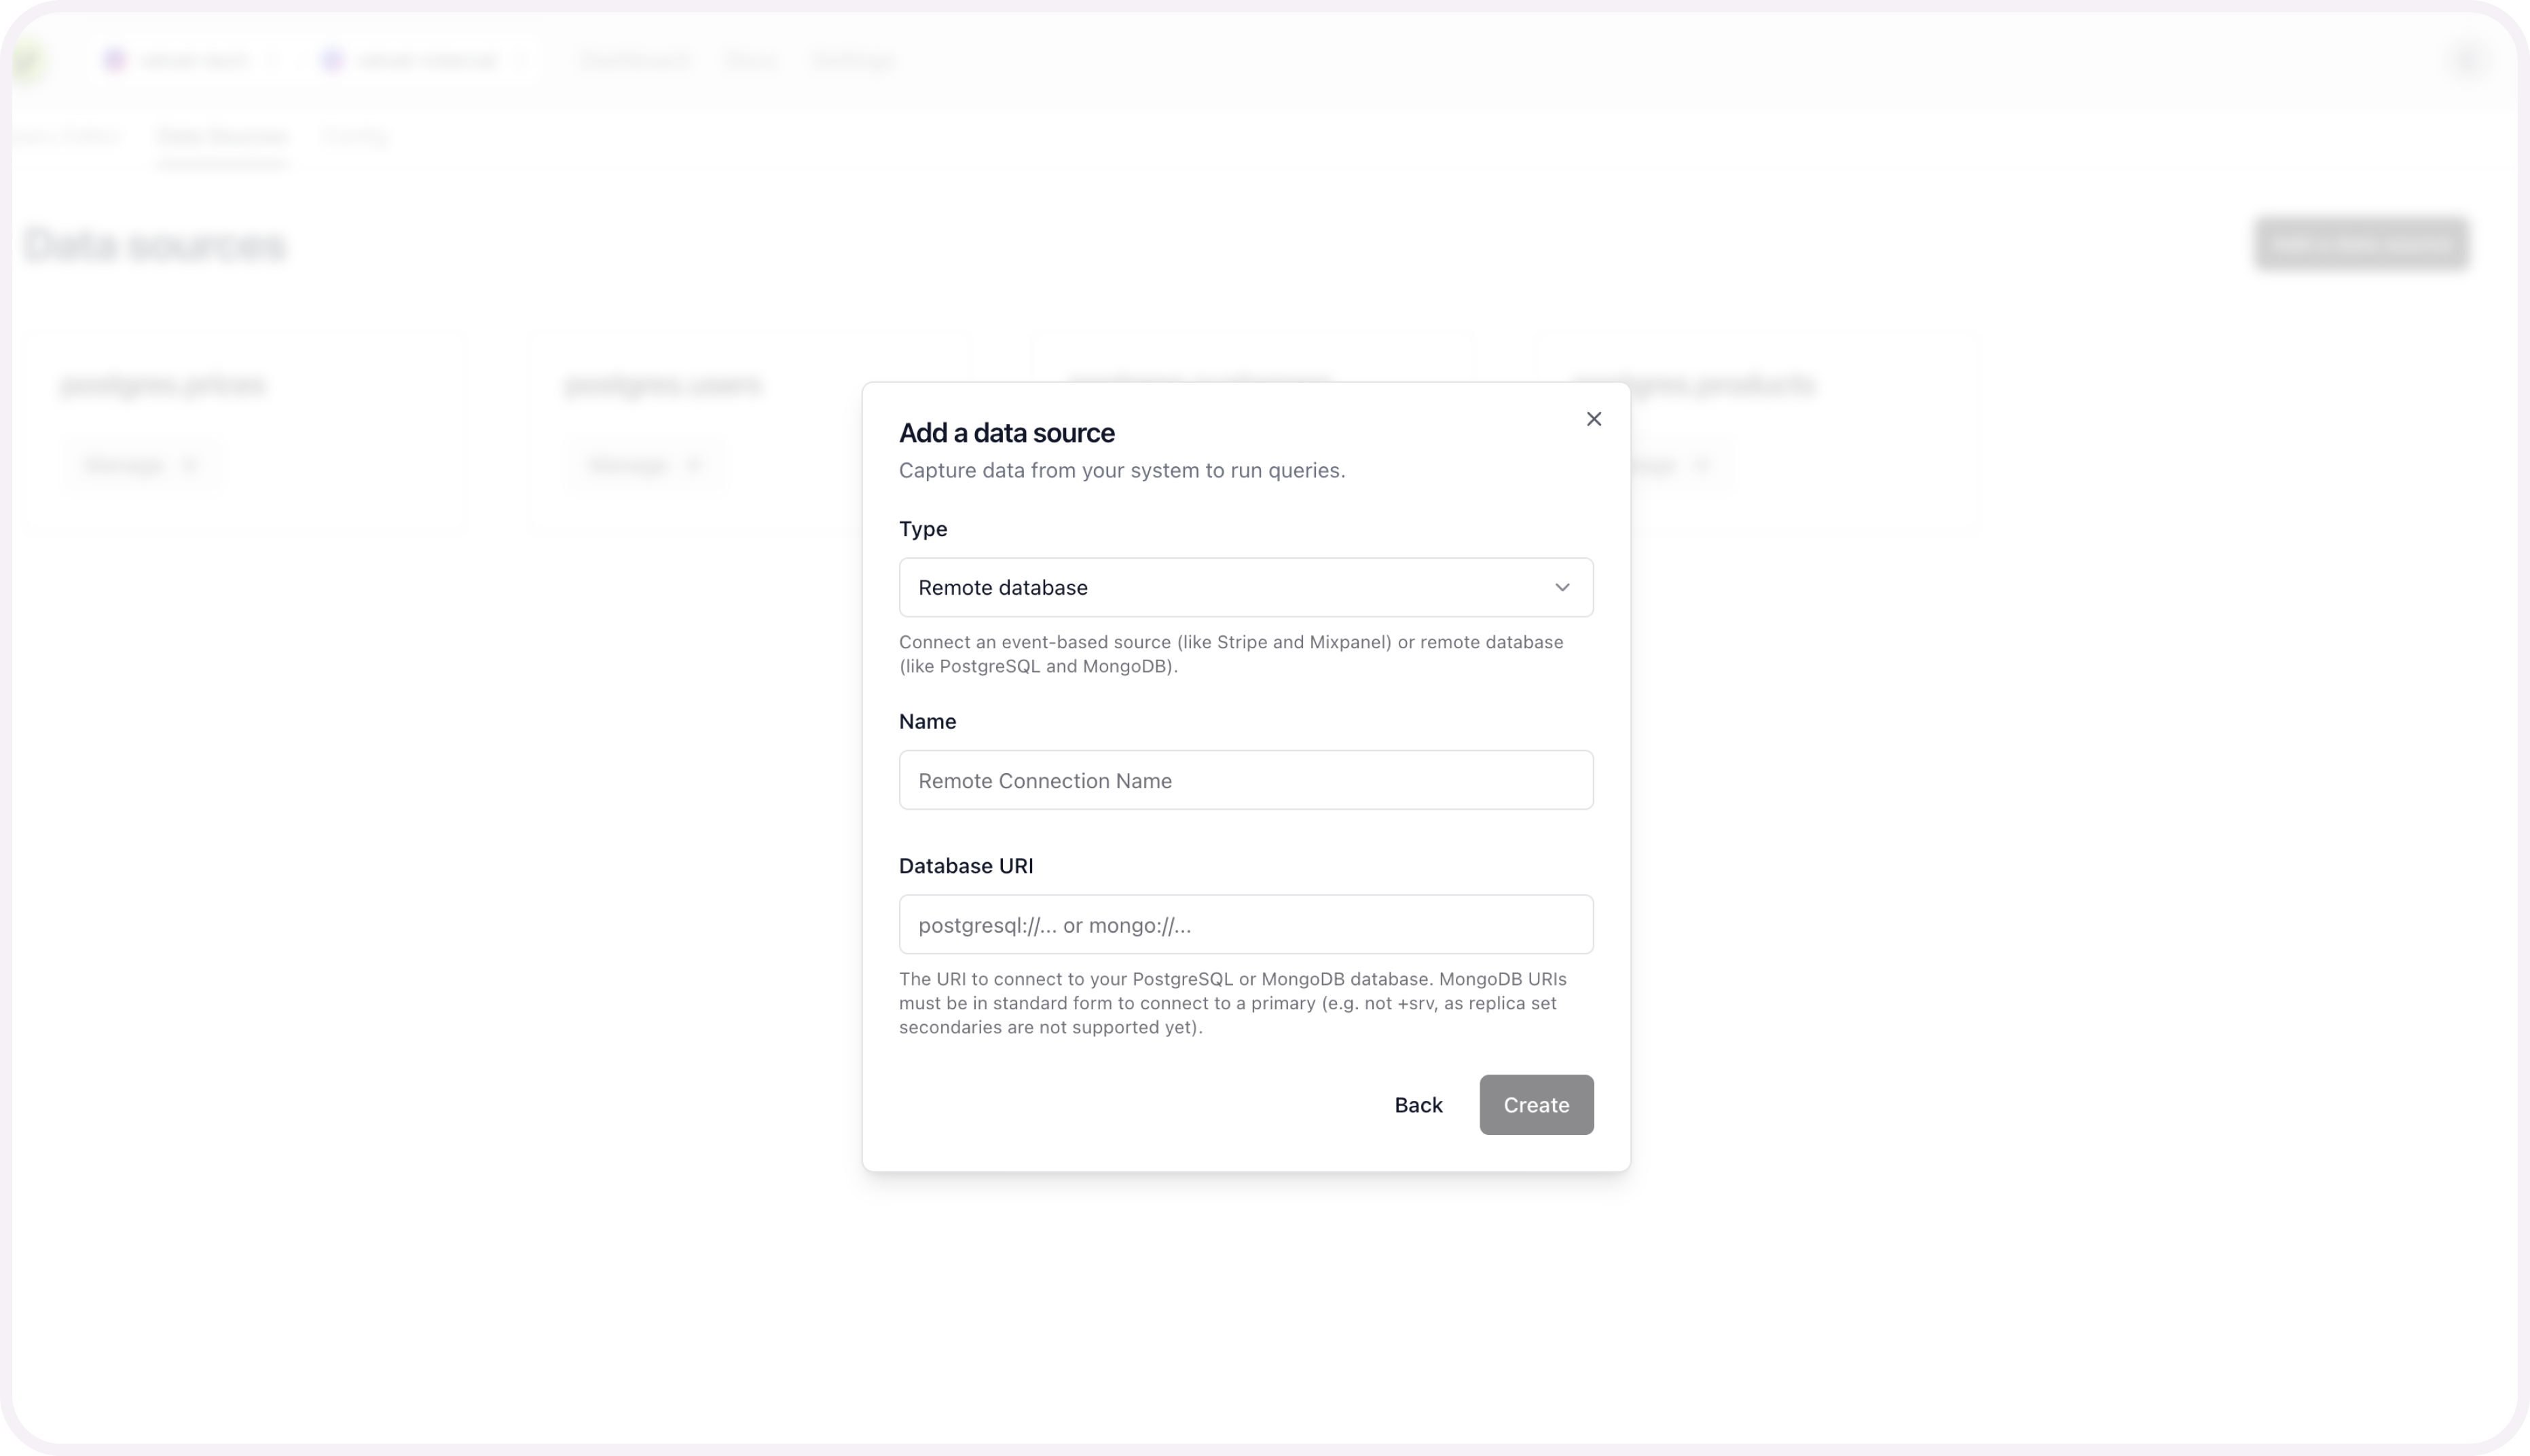
- Tap "Add a data source"
- Select type "Remote database"
- Name your database
- Paste in your database URI
- Press create
If you run into any errors, schedule a call or email [email protected].
Once your database is connected, you're ready to use the AI SQL editor. Close out of the modal to start using the editor on top of your database.
Schema mapping is optional, and only required if you want to query multiple sources at the same time.
5. [optional] Schema mapping for unified sources
This configuration is only required to query multiple data sources at the same time. For example - two databases at the same time, or stripe webhooks alongside your database tables.
You can set up this unified mapping any time.
Add schema mapping context
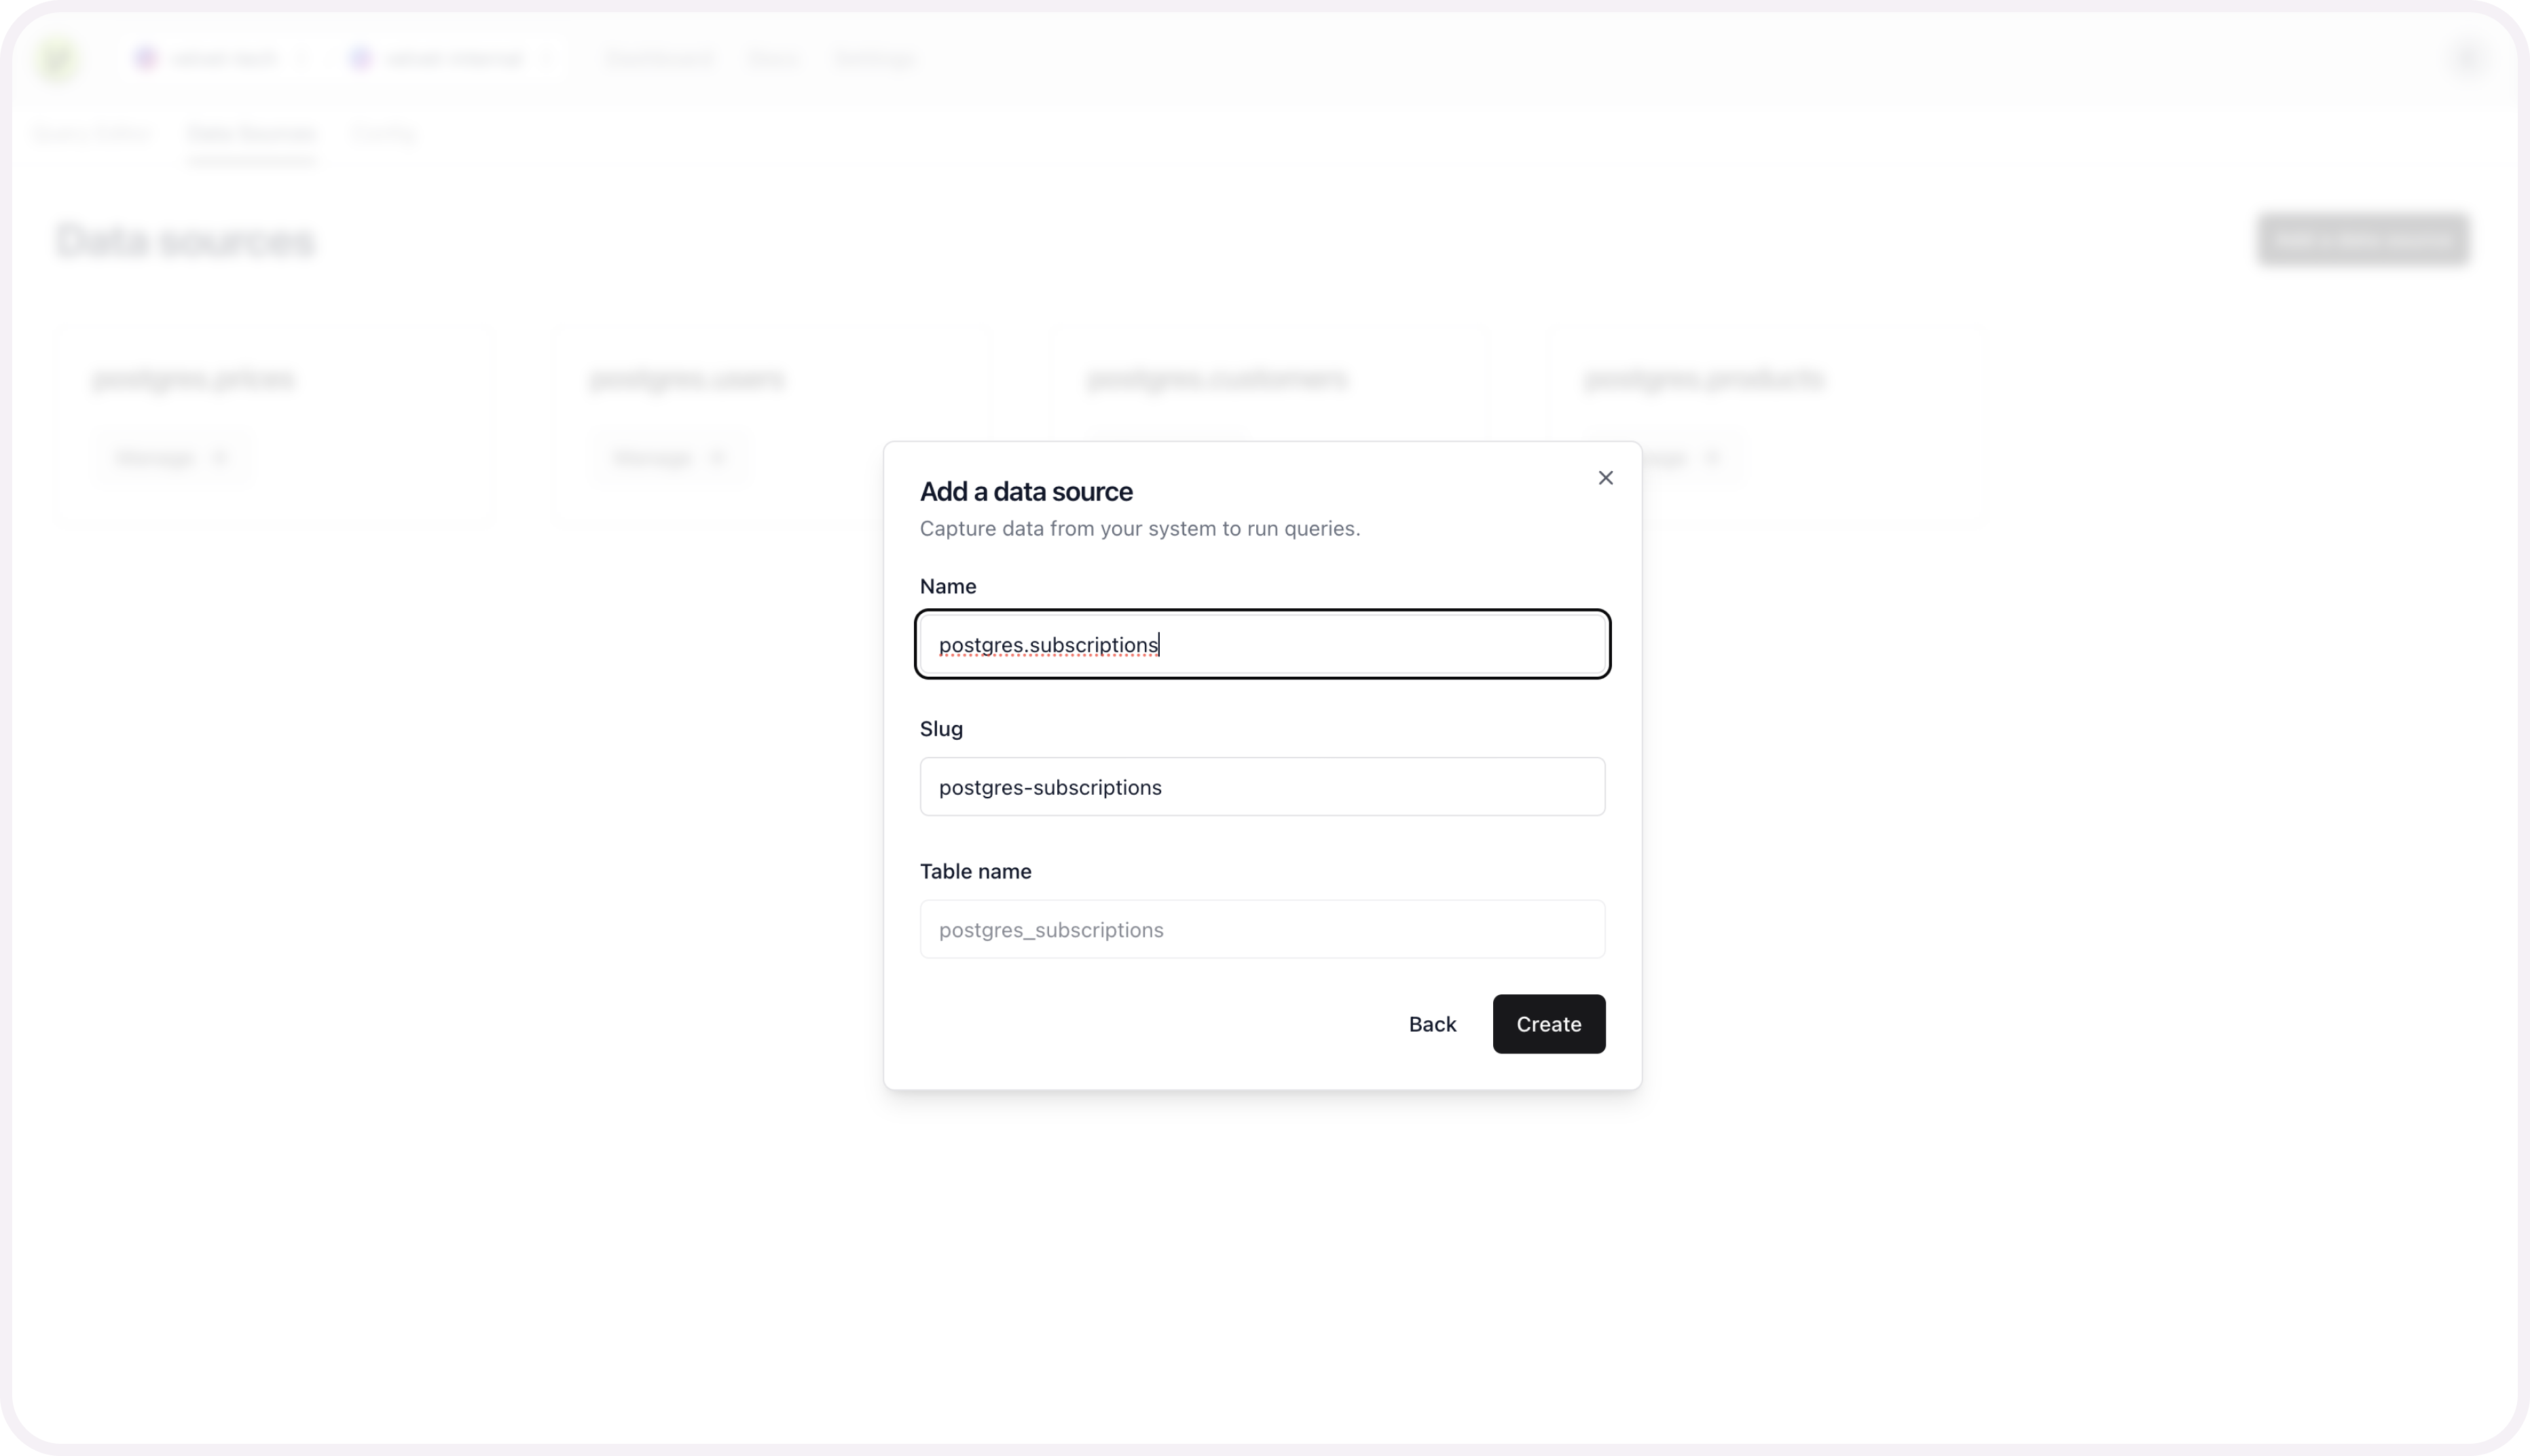
After you connect your database, you'll be prompted to configure the schema for each table you set up.

Name your table to create this source.
Repeat these schema mapping steps for each table you want included as a unified data source.
Get help
Email [email protected] if you need additional support.
Updated 3 months ago