
MariaDB
Guide to connect MariaDB to Velvet
Connect your MariaDB database to your Velvet workspace. You can skip some steps if you've previously connected to other services.
1. Create a read-only user
Create a user with read-only permissions in MariaDB.
Connect to your MariaDB server
Run the following SQL commands in a MariaDB client or command-line interface.
-
Create a Velvet read-only user with your password.
CREATE USER 'velvet_readonly'@'%' IDENTIFIED BY 'mypassword';The
%in the command above means that uservelvet_readonlycan be used to connect from any host or IP. You can limit the access by defining the host or IP from where the user can connect. -
Grant read-only permissions to the user. Replace
database_namewith the name of your database.GRANT SELECT ON database_name.* TO 'velvet_readonly'@'%';If you want the user to have read-only access to all databases:
GRANT SELECT ON *.* TO 'velvet_readonly'@'%';The
%in the command above gives the uservelvet_readonlyread-only access to the database from any host or IP. You can limit the access by defining the host or IP from where the user can connect. To grant access to a single table, specify the table name instead of*. -
After granting permissions, reload the privileges to ensure the changes take effect:
FLUSH PRIVILEGES;
2. Set static IPs
Configure network restrictions to allow Velvet's static IP addresses. Follow our static IP configuration guide.
3. Build your connection string
Read our general guide on URI construction here. The MariaDB-specific overview is below.
If you already have a connection string, skip to step #4.
Build your connection string (URI)
Ensure all characters that require encoding are converted to their percent encoded counterparts.
Characters to percent-encode:
%:%25&:%26/:%2F::%3A=:%3D?:%3F@:%40[:%5B]:%5D
The MariaDB connection string requires a username, followed by an optional password in the following format:
mariadb://username:password@
If you prefer to specify only the username, you can use:
mariadb://username@
The host (a name resolved by an external name system like DNS, an IP address or other direct address) and the port (port number on which the database server is running):
mariadb://username:password@host:port
If the MariaDB server is running on the default port (3306) you can omit the port component:
mariadb://username:password@host
The schema name is required and is provided after the host and port. The database name begins with a forward slash.
mariadb://username:password@host:port/database
You can also include additional parameters to customize the connection. These parameters are appended to the connection string and start with a question mark (?).
mariadb://username:password@host:port/database?sslmode=required
Common parameters::
charsetsslmodetimeout
Examples to illustrate these formats:
-
Only Username on Localhost
mariadb://username@localhost:5432/your_database -
Default port with Username and Password
mariadb://username:password@host/your_database -
Multiple Additional Parameters
mariadb://username:password@localhost:5432/your_database?sslmode=require&timezone=UTC&application_name=my_app&connect_timeout=10
Once done, copy your connection string to paste it into Velvet.
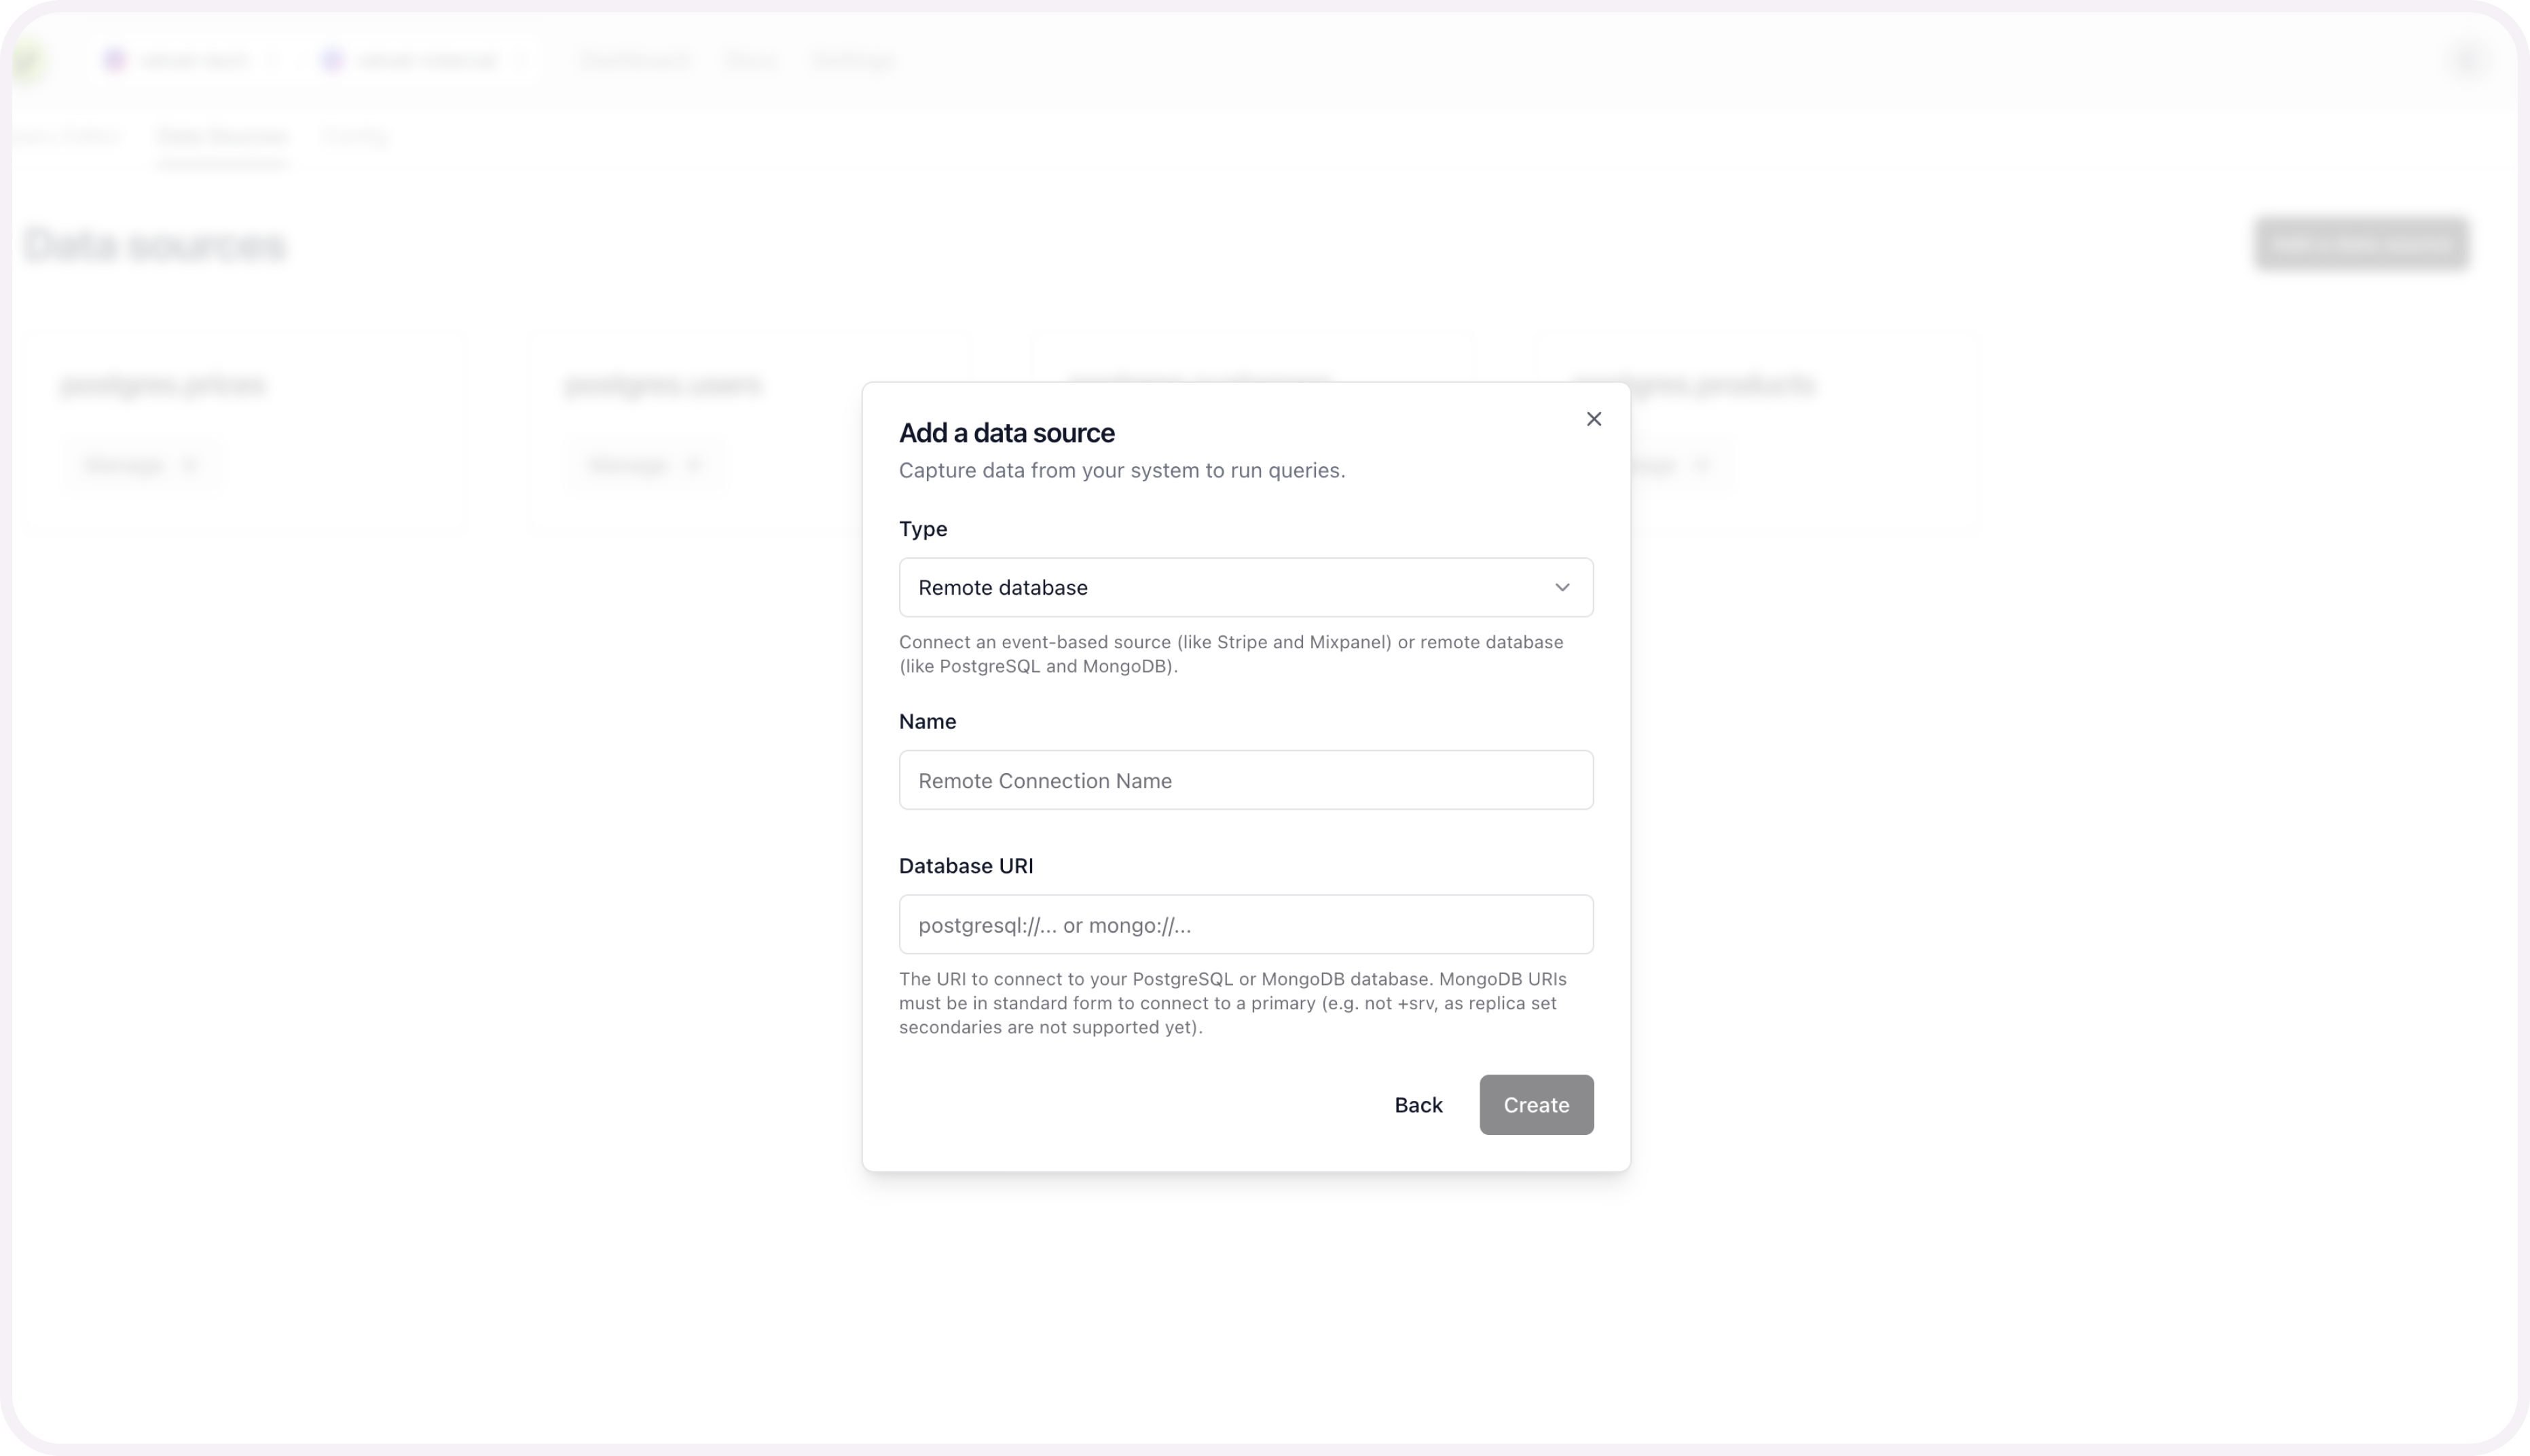
4. Connect your database
Connect your database to Velvet using your connection string.
- Tap into a workspace in your Velvet dashboard
- Tap "Add a data source"
- Select type "Remote database"
- Name your database
- Paste in your database URI
- Press create
If you run into any errors, schedule a call or email [email protected].
Once your database is connected, you're ready to use the AI SQL editor. Close out of the modal to start using the editor on top of your database.
Schema mapping is optional, and only required if you want to query multiple sources at the same time.
5. [optional] Schema mapping for unified sources
This configuration is only required to query multiple data sources at the same time. For example - two databases at the same time, or stripe webhooks alongside your database tables.
You can set up this unified mapping any time.
Add schema mapping context
After you connect your database, you'll be prompted to configure the schema for each table you set up.

Name your table to create this source.
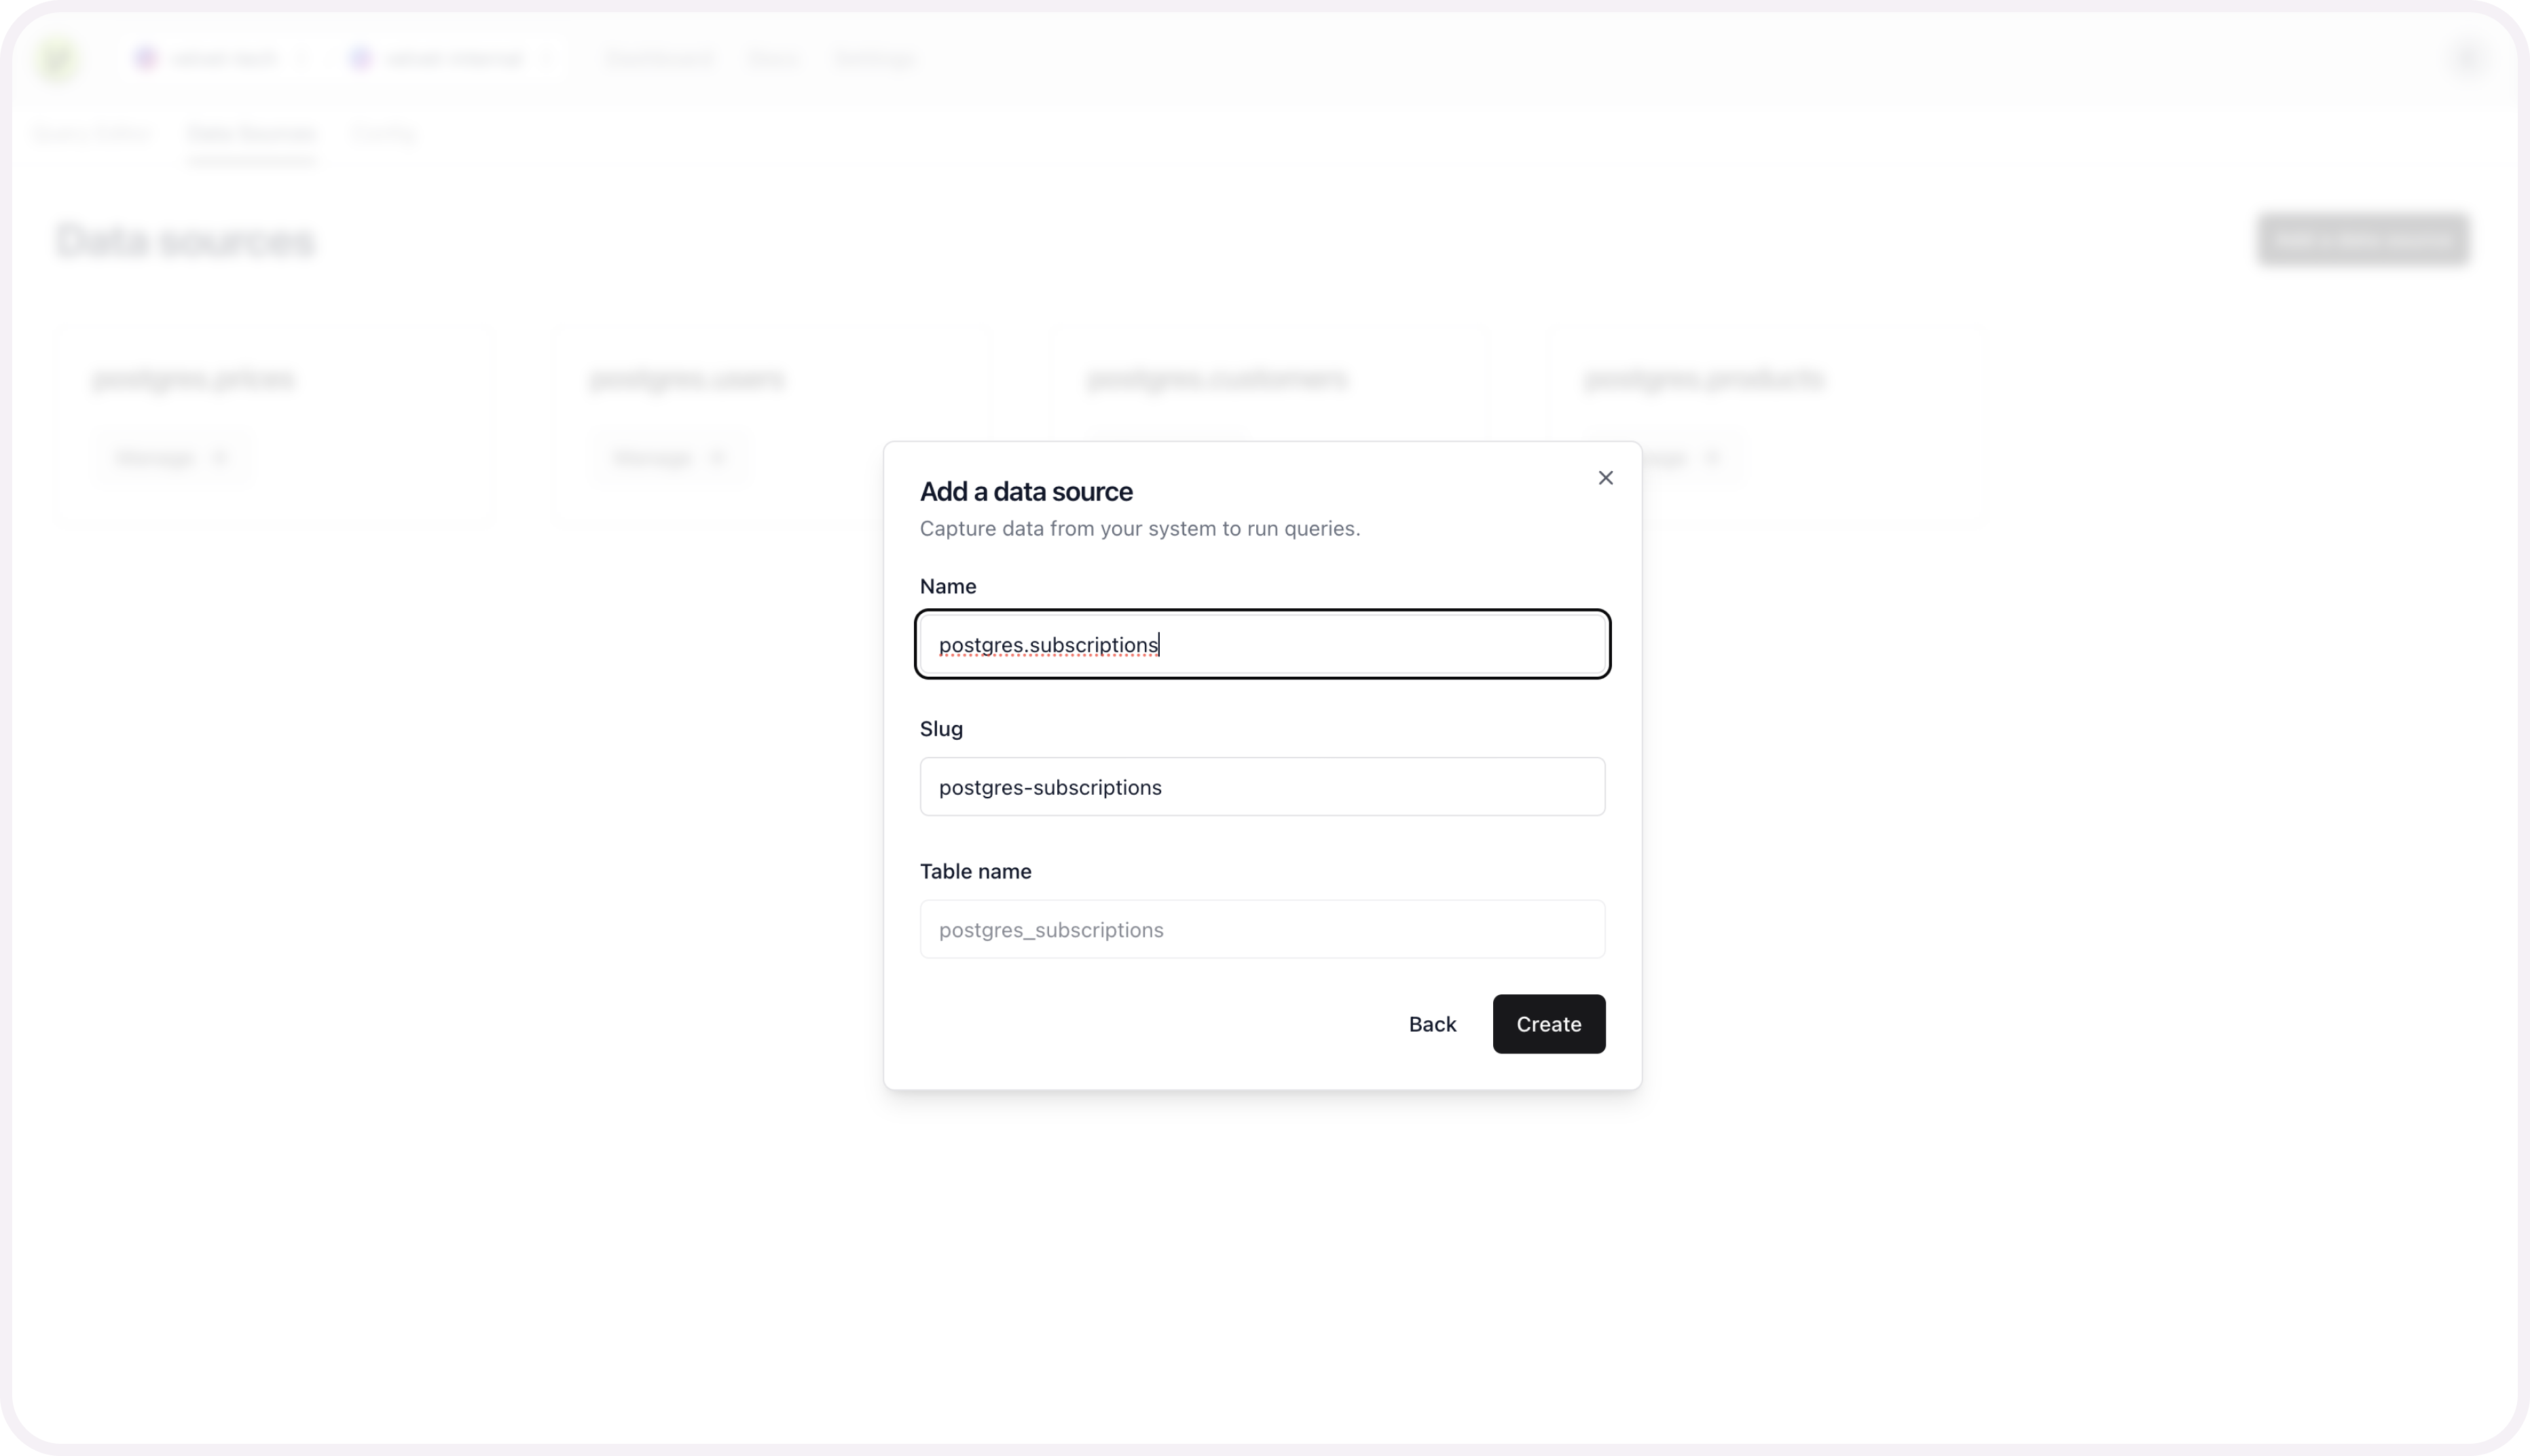
Repeat these schema mapping steps for each table you want included as a unified data source.
Get help
Email [email protected] if you need additional support.
Updated 3 months ago