
How do I optimize my Supabase connection pooler with Velvet?
Connections should be release as soon as they're used by Velvet.
Use case
"I recently adopted Supabase for a new project. Velvet is taking up more connections than my app and causing errors in production. How do I optimize my system while I'm still at a smaller database size?"
TLDR
- Your connections should be released as soon as they're used.
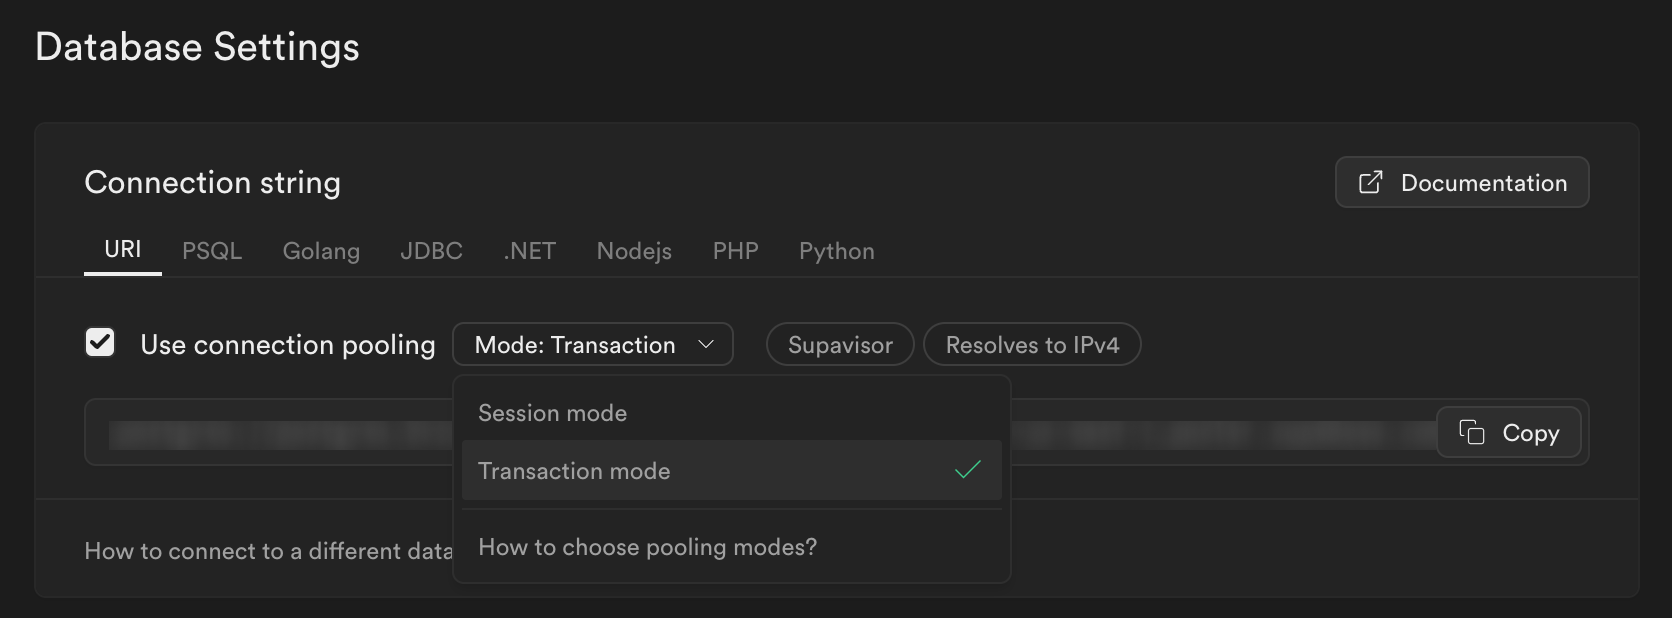
- Turn on transaction mode (instead of session mode) from the Supabase database settings page.
- Check what size compute you're using in Supabase, and size up when needed.
Solution
The way we've set up our system, your Supabase connections should be release as soon as they're used. You write a query, we connect, execute, and release.
But if you think about loading up the editor, we need connections to create the system prompt, load the data sources, load the suggested queries, and then execute the actual query. If you have an error and healing kicks in, that takes up a few more. So in the span of a minute there could be a dozen connections - but they should be released almost immediately after use.
Supabase recently (Feb 2024) swapped the default pooling mode. When it was in beta, the pooler was default in transaction mode. Now, the new default is session mode - probably because it was breaking people's setups that didn't have a database driver that could handle the pooler.
To fix this, turn on transaction mode (instead of session mode) from the Supabase database settings page. The only difference is the port number goes from 5432 to 6543.
For example, our read-only user connection string looks like postgres://velvet_readonly.[projectid]:[password]@aws-0-us-east-1.pooler.supabase.com:6543/postgres. By switching to transaction mode, we see a fixed count of 10 connections for our read-only user (I assume there's some overhead to pool connections per db user), but when doing a bunch of stuff concurrently - we never get more than 10 connections.
From Velvet's Supabase read-only user configuration
-- Create a new user with read-only access to the database
-- Recommend to run each step one by one, as some steps may
-- fail if the user does not have the necessary privileges.

-- Step 1: Create the user
CREATE USER velvet_readonly WITH LOGIN PASSWORD 'your_secure_password';

-- Step 2: Grant connect privilege to the database
-- (replace your_database_name with the actual name - on supabase it's postgres)
GRANT CONNECT ON DATABASE postgres TO velvet_readonly;

-- Step 3: Grant usage on schemas. This allows the user to see the schemas
GRANT USAGE ON SCHEMA public TO velvet_readonly;
GRANT USAGE ON SCHEMA auth TO velvet_readonly; -- optional

-- Step 4: Grant select on all tables and views in the schemas
GRANT SELECT ON ALL TABLES IN SCHEMA public TO velvet_readonly;
GRANT SELECT ON ALL TABLES IN SCHEMA auth TO velvet_readonly;

-- Step 5: Ensure future tables and views in these schemas are also accessible
ALTER DEFAULT PRIVILEGES IN SCHEMA public GRANT SELECT ON TABLES TO velvet_readonly;
ALTER DEFAULT PRIVILEGES IN SCHEMA auth GRANT SELECT ON TABLES TO velvet_readonly;

-- [OPTIONAL] Step 6: Bypass RLS policies
ALTER ROLE velvet_readonly BYPASSRLS;
And finally, keep an eye on what size compute you're using. Supabase scales up the default max connections per db user depending on your setup (basically there is some overhead to run each db user). Configure the per db user max connections on Supabase here.
Suggested reading on this topic
- Supavisor 1.0: A scalable connection pooler for Postgres
- Supabase: Connecting to your database
- Supabase: Custom Postgres Config
Need further support? Email us at [email protected] or schedule a call.
Updated 5 months ago