
Snowflake
Guide to connect Snowflake to Velvet
Connect your Snowflake database to your Velvet workspace. You can skip some steps if you've previously connected to other services.
1. Create a read-only user
Create a user with read-only permissions in Snowflake.
Create the velvet_read_all_data role and grant the necessary privileges. Create a velvet_readonly user with the password a very good password and assign them the velvet_read_all_data role.
- Create a read-only role:
velvet_read_all_data.
create role if not exists velvet_read_all_data;
- Grant the necessary privileges to the role (code example below).
Grant USAGE on the warehouse to be used for queries.
Grant USAGE on the database and schema with the objects to be accessed.
Grant SELECT on the specific tables or views that can be queried.
GRANT USAGE ON WAREHOUSE your_warehouse_name TO ROLE velvet_read_all_data;
GRANT USAGE ON DATABASE your_database_name TO ROLE velvet_read_all_data;
GRANT USAGE ON SCHEMA your_schema_name TO ROLE velvet_read_all_data;
GRANT SELECT ON ALL TABLES IN SCHEMA your_schema_name TO ROLE velvet_read_all_data;
- Create the
velvet_readonlyuser with the passworda very good password. Assign thevelvet_read_all_datarole.
CREATE USER velvet_readonly PASSWORD = 'mypassword';

GRANT ROLE velvet_read_all_data TO USER velvet_readonly;
Snowflake doesn't currently support granting privileges on future tables. You'll need to grant privileges on new tables manually.
2. Set static IPs
Configure network restrictions to allow Velvet's static IP addresses. Follow our static IP configuration guide.
Read more about Snowflake's network rules here.
3. Build your connection string
Read our general guide on URI construction here. The Snowflake-specific overview is below.
If you already have a connection string - copy it and skip to step #4.
Build a connection string
Follow the Snowflake-specific overview for URI construction below.
With Snowflake connection strings, you don't need to percent-encode special characters in the parameters. If special characters cause issues or you want to follow best practices, you can still percent-encode them.
Start with the protocol identifier for a Snowflake connection string:
snowflake://
The protocol identifier is followed by the Snowflake account URL which is the address where your Snowflake account is hosted.
The account URL follows the format:
<account-name>.snowflakecomputing.com
The is the unique name assigned to your Snowflake account. It's provided by Snowflake when you sign up for an account.
snowflake://account.snowflakecomputing.com/
Connection parameters come next. The required parameters are user which specifies the login name of the user for the connection and db which specifies the database to use once connected.
snowflake://account.snowflakecomputing.com/?user=peter&db=mydb&schema=public
You can also include additional parameters to customize the connection. These parameters are appended to the connection string and start with a question mark (?).
snowflake://account.snowflakecomputing.com/?user=peter&db=mydb&schema=public
Common parameters::
passwordaccountwarehouseroleCLIENT_SESSION_KEEP_ALIVEAPPLICATIONTIMEZONEQUERYTAGMULTI_STATEMENT_COUNTCLIENT_METADATA_REQUEST_TIMEOUTROLEDB_CONNECT_OPTIONS
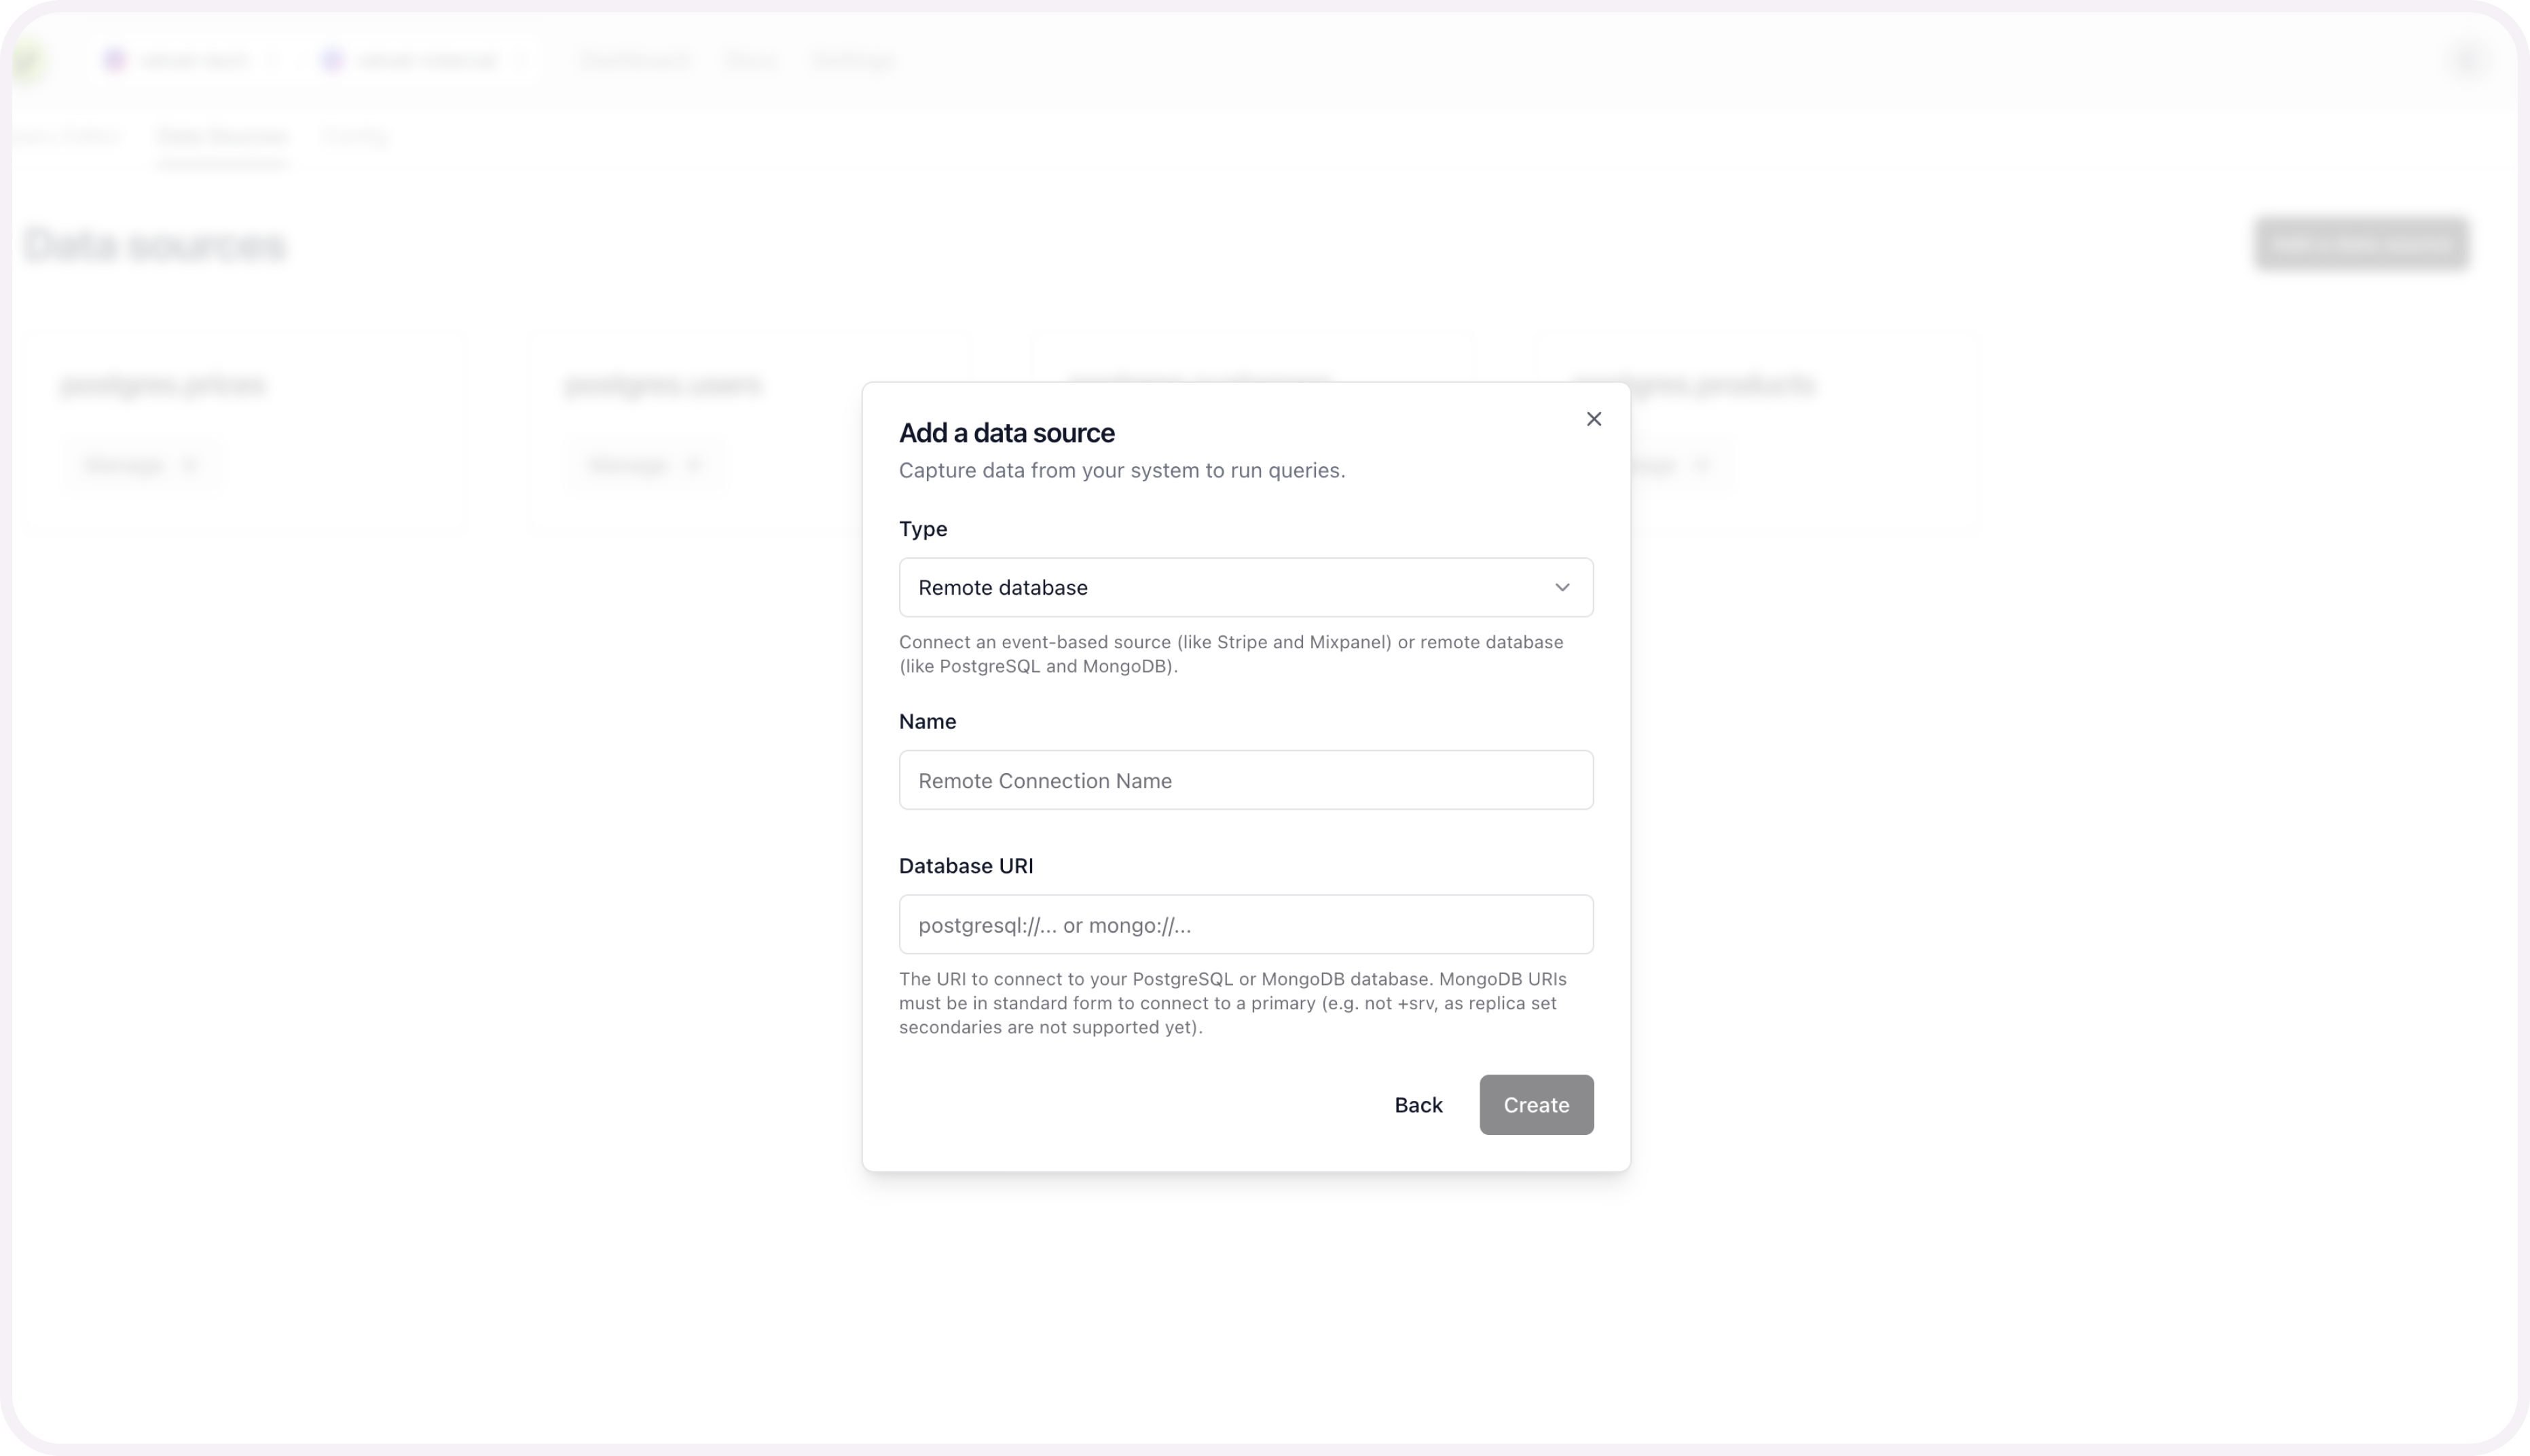
4. Connect your database
Connect your database to Velvet using your connection string.
- Tap into a workspace in your Velvet dashboard
- Tap "Add a data source"
- Select type "Remote database"
- Name your database
- Paste in your database URI
- Press create
If you run into any errors, schedule a call or email [email protected].
Once your database is connected, you're ready to use the AI SQL editor. Close out of the modal to start using the editor on top of your database.
Schema mapping is optional, and only required if you want to query multiple sources at the same time.
5. [optional] Schema mapping for unified sources
This configuration is only required to query multiple data sources at the same time. For example - two databases at the same time, or stripe webhooks alongside your database tables.
You can set up this unified mapping any time.
Add schema mapping context
After you connect your database, you'll be prompted to configure the schema for each table you set up.

Name your table to create this source.
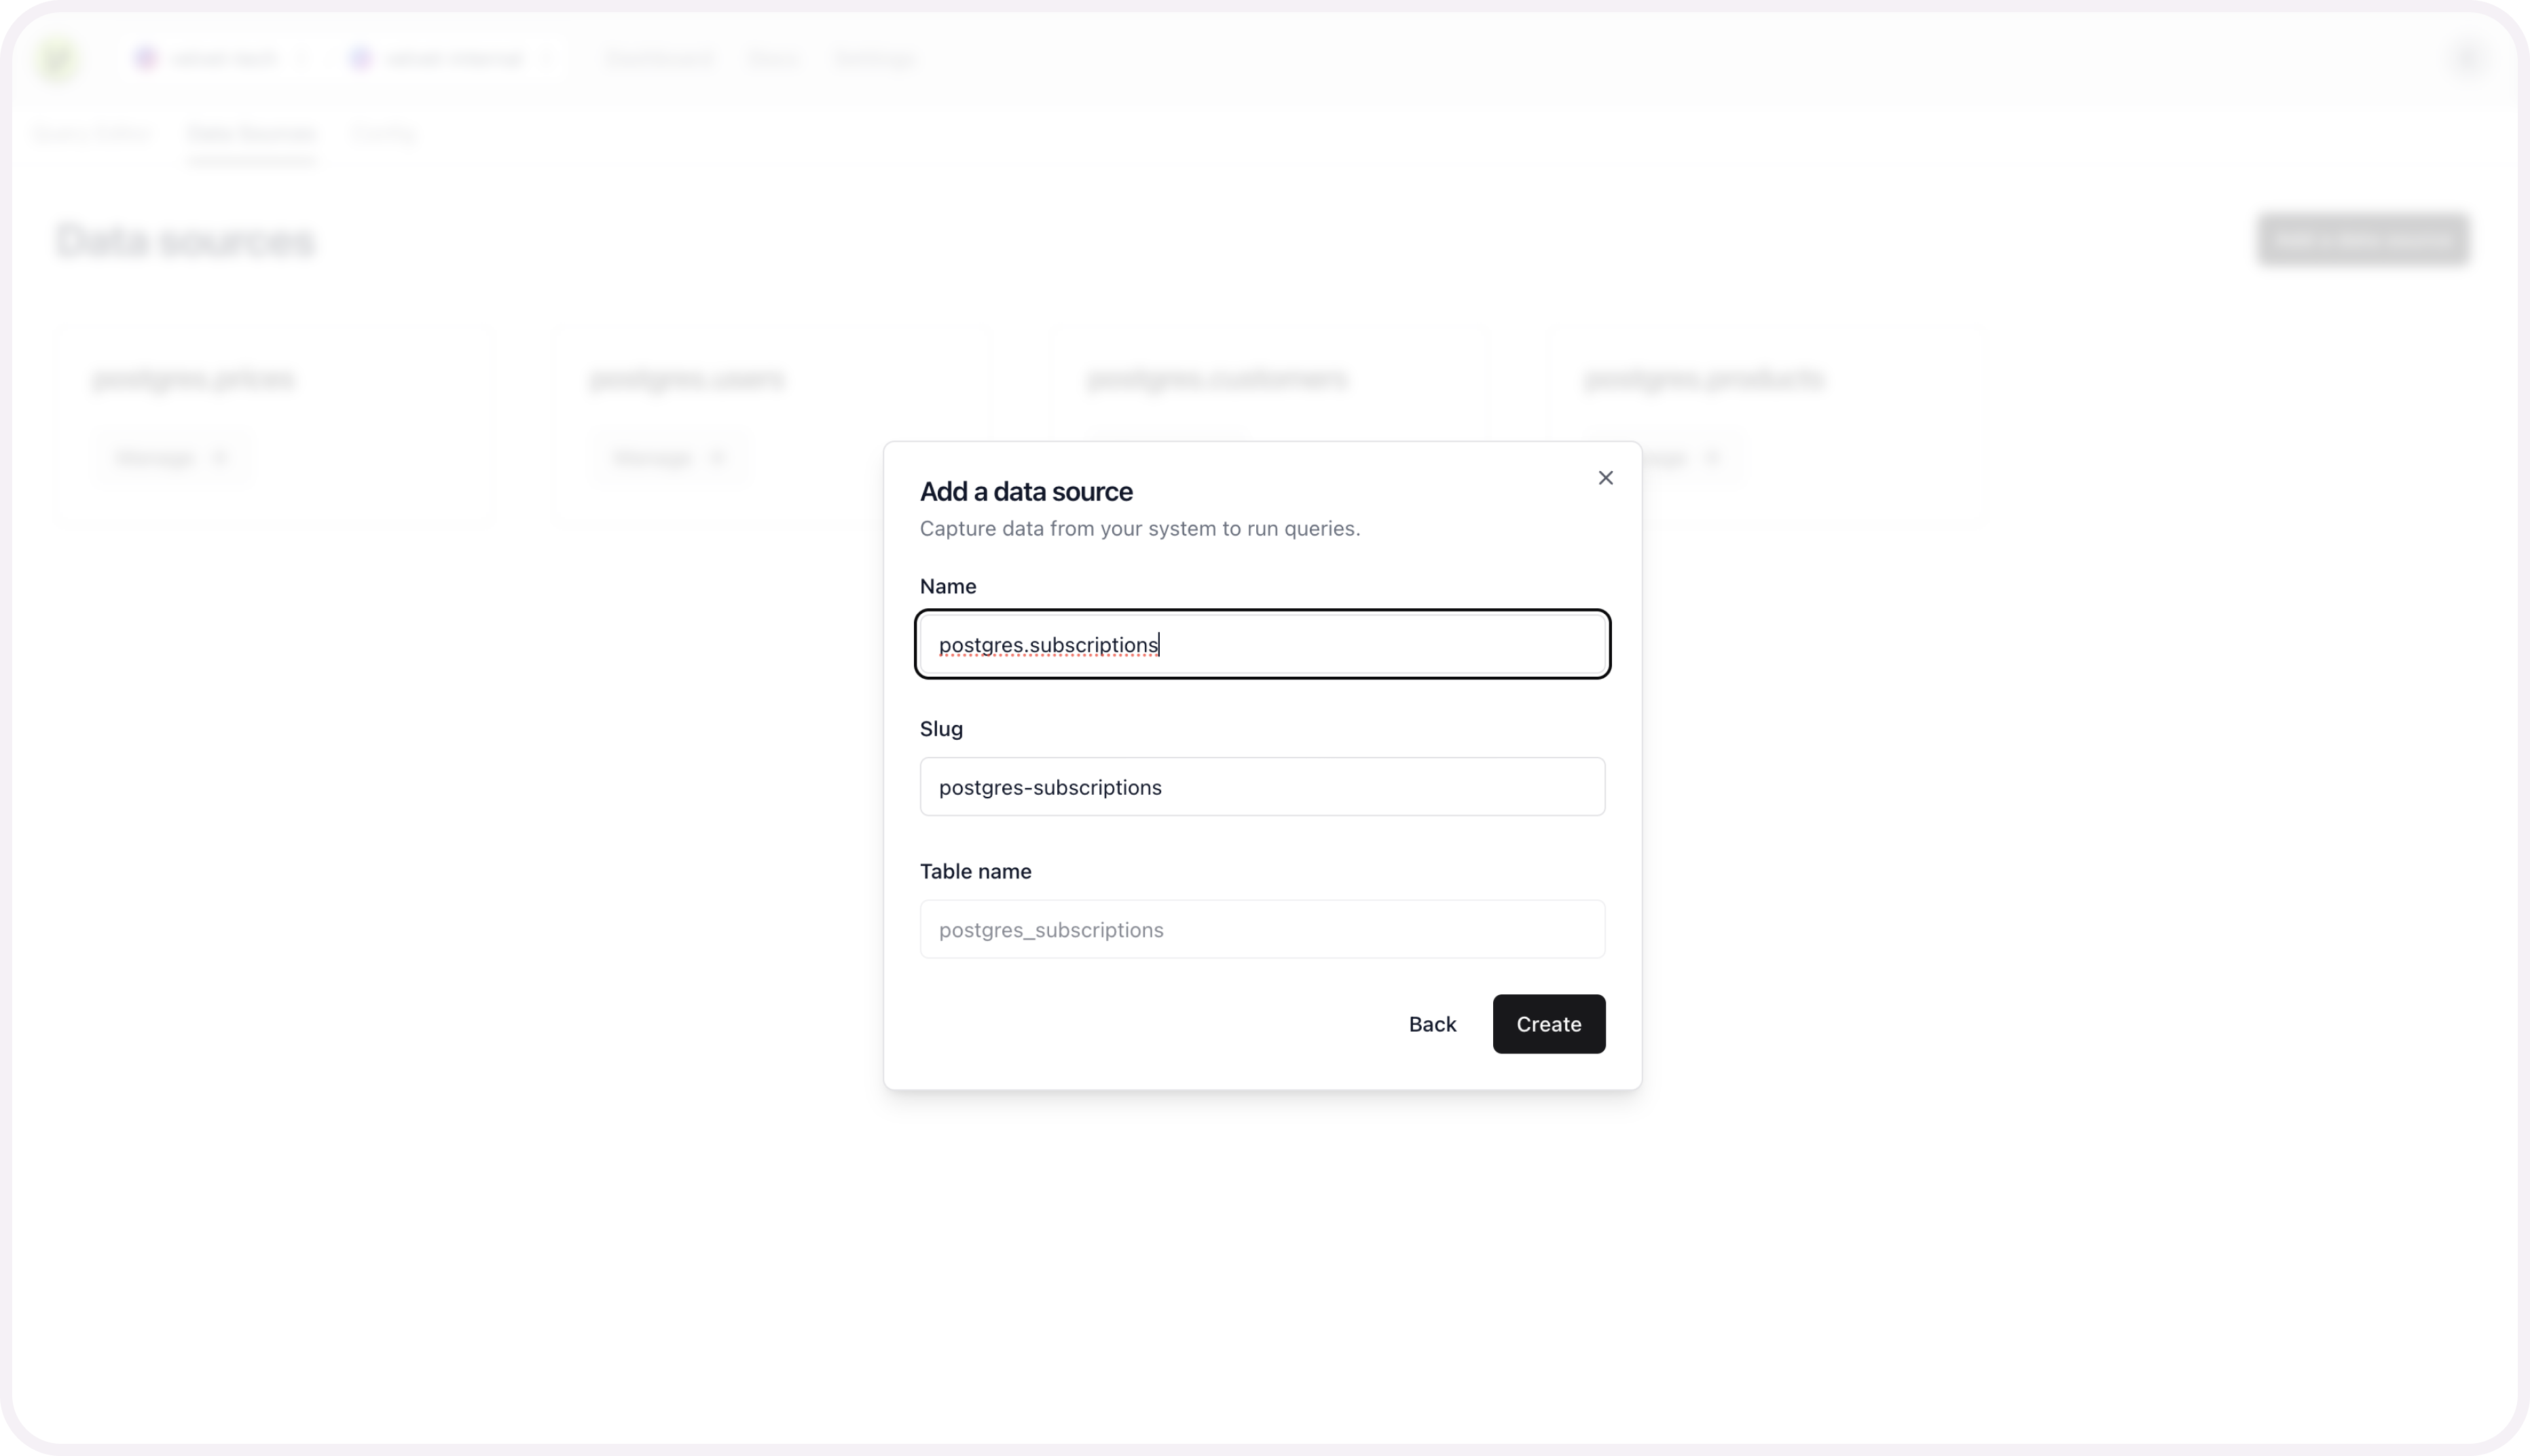
Repeat these schema mapping steps for each table you want included as a unified data source.
Get help
Email [email protected] if you need additional support.
Updated 3 months ago